Create a study
To create a study, choose a study type and mesh type, apply a material to the model, and select the study geometry.
-
From the ribbon, choose the Simulation tab→Study group→New Study command
 .
. -
In the Create Study (or Modify Study) dialog box, do all of the following:
-
Choose a finite element analysis Study type.
-
Coupled studies (For example, thermal stress analysis couples a thermal study with a structural study.)
Note:The study types that are available for selection in the Create Study dialog box are based on your simulation license level. For more information, see QY CAD Simulation licensing.
-
Choose the Mesh type.
-
(Optional) Click the Options button to expand the dialog box and display the non-default options that are available for the model and the study type you have selected.
- Processing Options
-
You can use the Advanced Options for studies to specify additional NX Nastran processing criteria.
- Results Options
-
You can use the Results Options for studies to select additional display options that you want to see in the results. Default plots are generated for each study, but if you want to see a specific type of result, you can select it from Results Options. For example, if you want to display strain plots for a linear static study, select the Strain elemental result option.
-
Click OK to continue.
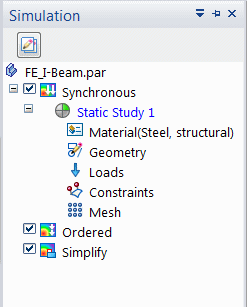
The study name is added to the Simulation pane.
-
-
Verify or apply a material. (In an assembly, material is applied to individual parts. To change it, you have to edit the part.) In a part or sheet metal model, you can assign a material directly in the simulation study. On the Simulation tab→Study group, do one of the following:
-
Click Material Table
 , and then choose a new material or edit an existing material using the Material Table dialog box.Tip:
If you open the Material Table, you can select the Highlight Simulation Properties button
 to identify the material properties that are required for the type of study you created. Verify that values are defined for each of the properties that are highlighted. For more information, see Verify simulation material properties.
 -
From the Material List, select a material.
-
-
Choose the Simulation tab→Geometry group→Define command
 to select the geometry to include in the study. You can select bodies, features, faces, occurrences, mid-surfaces, and other geometry, based on your model type, mesh type, and geometry type, as shown next.
 -
For this model type
And this mesh type
Select this geometry type
Part (.par)
Tetrahedral
Select a body.
Surface
Select a single continuous surface or face.
General Bodies
Select a united body.
Sheet metal (.psm)
Tetrahedral
Select a body.
Surface
Select an existing mid-surface, or create a mid-surface using the Simulation tab→Geometry group→Mid-Surface command
 . Add it to the study using the Define command.
General Bodies
Select a body, surface, or design body. You can select united bodies from the Geometry node in the Simulation pane.
Assembly (.asm)
Tetrahedral
Select one or more occurrences.
Tip:Click the Select All button
 on the command bar to include all of the visible (shown) active and inactive geometry in the study.
To learn more:
Surface
Select one or more surfaces or faces using the Simulation Geometry tab→Surface group→Mid-Surface command.
Mixed and General Bodies
Select occurrences, mid-surfaces, design bodies, or united bodies.
To learn more, see Preparing and selecting united bodies for studies.
Frame (.asm)
Beam
Select a frame feature.
-
When you are finished selecting geometry, click Accept on the command bar, or right-click or press Enter.
-
-
You also can add or remove geometry in the study using the Define command on the Geometry node shortcut menu in the Simulation pane. See Selecting geometry for studies.
-
Model state options—You can create a study using a simplified model.
-
For thermal studies, you can select the Thermal Load Options button and then specify advanced options for radiation and convection loads in the Thermal Load Options dialog box.
-
You also can do any of the following from the Simulation pane:
-
Right-click the Simulation node at the top of the tree-view and choose the New Study command.
-
Select an existing study name, and then choose Rename from the shortcut menu to rename it.
-
-
To learn about these icons
 , see: Reviewing the study status.
© 2021 UDS