Activity: Mirror and copy features
Mirror and copy features
In this activity you will create a hole. Then you will create a mirror copy of the jog and hole.
Launch the Activity: Mirror and copy features.
Construct a hole
![]()
You will construct a hole in the jog at the back of the part.
-
Choose the Home tab→Sheet Metal group→Hole command
 .
.
Use the Zoom Area command
-
At the bottom-right side of the QY CAD application window, click Zoom Area
 , then zoom in as shown. This will make it easier to construct the hole.
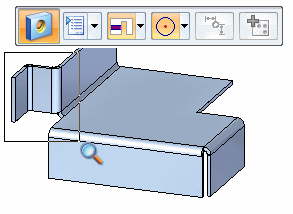
-
After you have resized the view area, click the right mouse button to exit the Zoom Area command.
Draw a hole
-
On the command bar, click the Hole Options button
 .
. -
On the Hole Options dialog box, set the Standard to ANSI Metric.
-
On the Hole Options dialog box, set the Size to 10 mm.
-
Set the Through Next option
 .
. -
Click OK on the Hole Options dialog box.
-
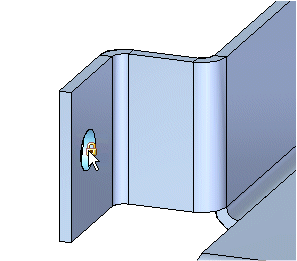
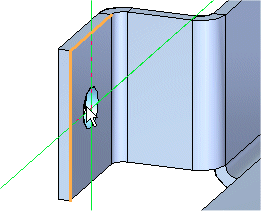
Position the hole over the jog face, as shown, and press the F3 key to lock to the plane.
-
Set the Keypoint option to Midpoint
 .
. -
Move the cursor across the left edge of the jog, and then position the cursor at the midpoint of the edge.
-
Move the cursor across the top edge of the jog, and then position the cursor at the midpoint of the edge.
-
Move the cursor downward and when the center of the circle reaches the midpoint both edges, as shown, click to place the hole.
-
Right-click to display the hole dimension.

-
Press the F3 key to unlock the plane.
-
Click to finish the Hole command.
Fit the view
![]()
-
Choose the Fit command
 to fit the contents of the view to the graphics window.
Save the file
![]()
-
On the Quick Access toolbar, click the Save button
 to save the work you have done so far.
Mirror and copy the jog and hole
![]()
You will now construct a jog and hole on the other side of the part. You could do this by constructing another jog and hole, following the same steps you used earlier. However, a faster method is to construct a mirrored copy of the jog and hole you constructed earlier.
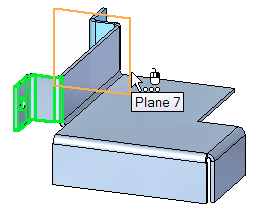
Create the mirror plane
-
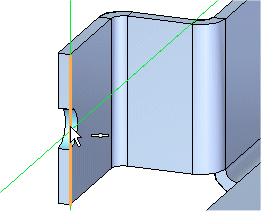
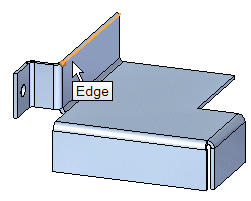
Choose the Home tab→Planes group→More Planes list→Normal to Curve command.
-
Position the cursor over the edge, then click to select it.
-
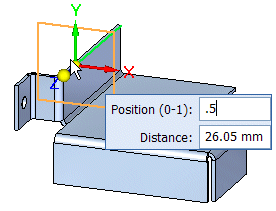
Type .5 for the position, and then press Enter.
-
Click to finish placing the reference plane.
![]()
When constructing a mirrored feature, you specify the plane of symmetry for the new mirrored feature. Because there is no plane through the center of the part, you will create a reference plane along an edge on the part.
Select the jog and hole
-
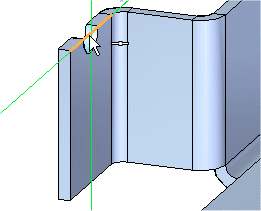
In PathFinder, press and hold the <Ctrl> key and the select the features that make up the jog, as shown.
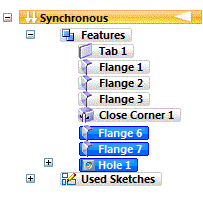
Notice that as they are selected in PathFinder, the elements highlight in the model.
![]()
Select the Mirror Copy command
-
Choose the Home tab→Pattern group→Mirror command
 .
. -
Position the cursor over the mirror plane, as shown, and click.
-
Press <Esc> to exit the Mirror command.
![]()
Hide the reference plane
-
Position the cursor away from the model and right-click.
-
On the shortcut menu, choose Hide All→Reference Planes.
![]()
Save the file
![]()
-
On the Quick Access toolbar, click the Save button
to save the work you have done so far.
© 2021 UDS