Activity: Create a jog
Create a jog
![]()
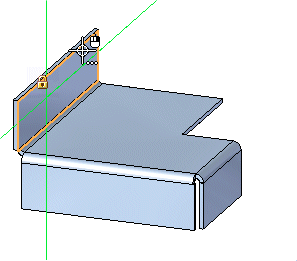
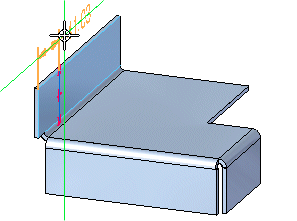
You will construct a jog at the left edge of the part, as shown in the illustration. You will draw a line to be used to construct the jog. The sketch element used to construct the jog must be a single line that is coplanar with the face being bent and at least one end of the line must lie within the area defined by the tab or flange edges.
Launch the Activity: Create a jog.
Start the Line command
![]()
In the next few steps, you will draw and dimension the line shown in the illustration.
-
Choose the Home tab→Draw group→Line command
 .
.
Draw a line
-
Position the cursor over the face of the flange and press the F3 key to lock the plane.
-
Position the cursor at the top of the model face, as shown below. When the long model edge highlights and the relationship indicator
 appears, click to start the line.
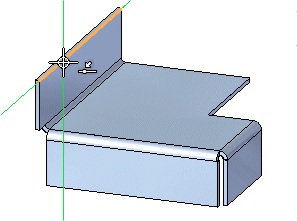
-
Move the cursor until:
-
The vertical relationship indicator is displayed as shown below.
-
The long model edge highlights and the relationship indicator
appears.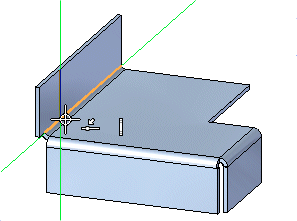
-
-
Click to finish the line.
-
Press the F3 key to unlock the plane.
Select the dimension origin
-
Choose the Home tab→Dimension group→Distance Between command
 .
. -
Position the cursor over the left edge of the flange. When the line highlights, click.

Select the element to measure to
-
Position the cursor over the line. When the edge highlights, click.
Position the dimension
-
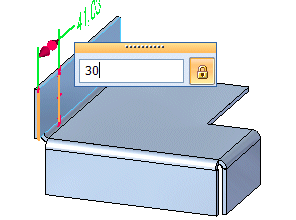
Move the cursor around and notice that the dimension can measure either the horizontal distance between the lines or the vertical distance between the top and bottom endpoints of the two lines. Move the cursor up and down between the top and bottom extents of the lines to toggle the dimension to the horizontal distance.
-
Position the dimension as shown, and click.
Edit the dimension
-
Type 30 as the new dimension value, then press Enter. The profile geometry changes to match the new dimension value.
Start the Jog command
![]()
-
Choose the Home tab→Sheet Metal group→Bend list→Jog command
 .
.
Select a line to apply the jog
-
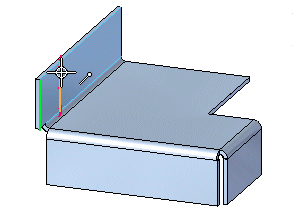
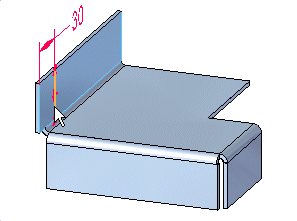
Position the cursor over the line, as shown.
-
When the line highlights, click.
Select a line to apply the jog
-
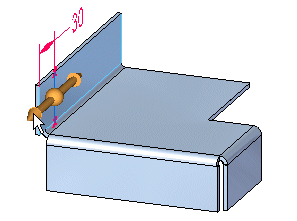
Click the arrow, as shown, to define the direction for the jog.
Define the jog direction and extent
-
Position the cursor as shown above, and then in the dynamic input box, type 25, then press the Enter key.

The finished feature is displayed.
![]()
Fit the view
![]()
-
Choose the Fit command
 to fit the contents of the view to the graphics window.
Save the file
![]()
-
On the Quick Access toolbar, click the Save button
 to save the work you have done so far.
© 2021 UDS