Activity: Place a bolt in the assembly
Place a bolt in the assembly
This activity:
-
Uses the Insert option to place a bolt in the assembly
Launch the Activity: Place a bolt in the assembly.
Open the assembly file
-
Open the assembly saved in the previous activity, if it is not already open.
Place the first bolt
![]()
-
Click the Parts Library tab
 .
. -
In the file list area on the Parts Library tab, select the bolt24x50.par file, hold the left mouse button down, drag the file into the graphics window, then release the mouse button at the approximate position shown.
Use the Zoom Area command
![]()
-
On the Viewing commands toolbar, choose Zoom Area, then zoom in as shown in the illustration. This will make it easier to place the bolt.

-
After resizing the view area, right-click to exit the Zoom Area command.
Insert the bolt into the support
Use a different part positioning option to position the bolt.
-
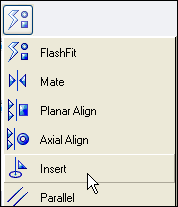
On the Assemble command bar, in the Relationship Types list, click the Insert option, as shown above.
The Insert option applies a mate relationship and an axial align relationship between the part being placed and a part in the assembly. The axial align relationship is placed using the Fixed option, which fixes the rotational orientation of the part.
To control the rotational orientation of the part, edit the axial align relationship later. The Insert option is very useful for assembling a cylindrical part, such as a bolt, into a hole.
The Insert option requires that all relationships are placed to only one part in the assembly. If the part being placed needs to be positioned with respect to more than one part in the assembly, place the relationships individually using FlashFit, or the Mate and Axial Align options.
Select the planar face to mate on the bolt
![]()
-
Select the planar face shown.
Select the planar face on the support
![]()
-
Select the planar face shown.
Select the cylindrical axis on the bolt
![]()
-
Select the cylindrical axis shown.
Select the cylindrical axis on the support
![]()
-
Select the cylindrical axis shown.
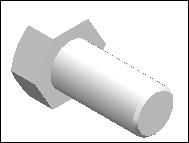
Observe the result
![]()
The bolt is inserted into the support.
The result of the Insert command is that the fastener is positioned by a mate relationship and a locked axial align relationship. Using Flashfit and matching circular edges will give the same result with few selections. This technique is more efficient than using the Insert command.
Fit the assembly window
![]()
-
Choose Fit to fit the contents of the view to the graphics window
 .
. -
On the Quick Access toolbar, choose Save
 .
.
© 2021 UDS