Activity: Define the members of a family of parts
Defining the members of a family of parts
In this activity you will create the initial definition of three members of a family of parts.
Launch the Activity: Define the members of a family of parts.
Open the activity file
-
Open ...\Program Files\UDS\QY CAD 2022\Training\seppcfp.par.
Save the file to a new name or location
-
At the top-left side of the application window, click the Application button
 .
. -
On the Application menu, click the Save As→Save As button
 .
. -
Save a copy of the file to a new name or location, so others can work through this tutorial when you are finished. For example, you can add your initials to the filename.
Later in this tutorial, you create several new, related files. Therefore, it might be convenient for you to create a separate sub-folder for this and the new related parts.
Turn on the Family of Parts pane
-
On the command ribbon, in the View tab→Show group (A), click Panes (B).

-
On the Panes list, click Family of Parts
 .
. -
In PathFinder, click the Family of Parts tab
 to display the family of parts functions shown.
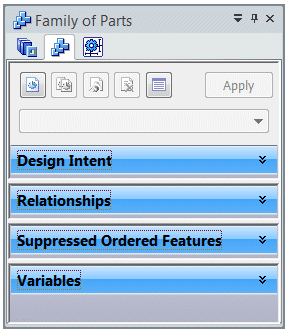
Name the first family member
-
Design Intent
-
Relationships
-
Ordered feature suppression
-
Constructions
-
Variables
-
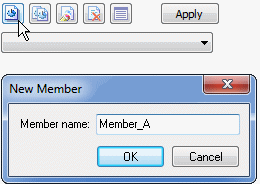
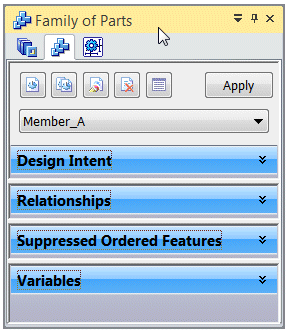
On the Family of Parts pane, click the New
 button.
 -
In the New Member dialog box, type Member_A, and click OK.
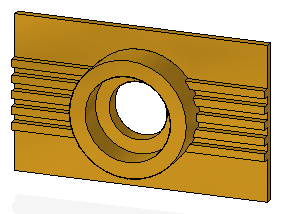
The opened part file is the master file of the family of parts. The part contains both synchronous and ordered features. Within the master file, you define several family members.
Each family member has the same features as the master file, but the members are controlled with:
Observe the definition of the new family member
-
The Family of Parts pane displays only the properties of the selected family member.
-
The Family of Parts Edit Table displays the properties of all family members.
-
On the Family of Parts pane, click the Edit Table button (A).
-
Hide the Family of Parts pane. On the Family of Parts pane, click the Auto Hide button.
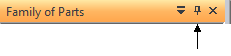
The pane collapses on the left side of the window. If you want to show the pane, click the Family of Parts tab (A).
You can use the Family of Parts pane or the Family of Parts Edit Table to define a member.
For the remainder of the tutorial, use the Family of Parts Edit Table instead of the Family of Parts pane.

Observe the new family member using the edit table
-
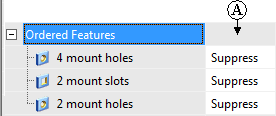
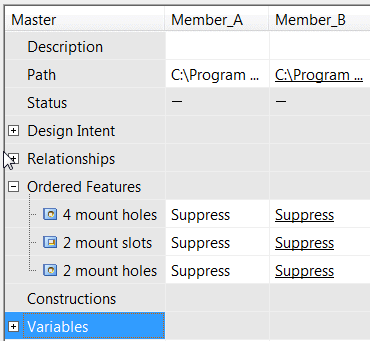
In the Family of Parts Edit Table, expand the Ordered Features collector.
Notice that the ordered features are suppressed in the Member_A column (A). This is because the ordered features are suppressed in the master file.
-
In the Family of Parts Edit Table, click the expand button (A) on the Variables collector.
Notice that there are no master file variables overridden (B) with Member_A. In the next few steps, create another family member and edit variable values. When editing a variable, that variable populates to all members.
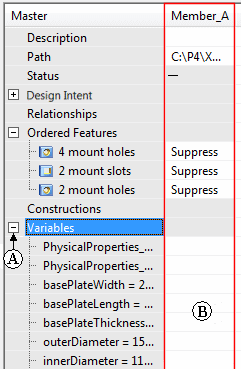
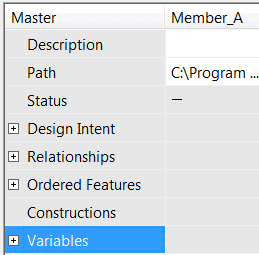
At this point, Member_A has the same definition as the master file.
Create a second family member
-
In the Family of Parts Edit Table, click the New button
. -
In the New Member dialog box, type Member_B as the name of the new family member, and then click OK.
In the edit table, notice that there is a new column for Member_B. The new member inherits all of the current characteristics of the master part.

Create a third family member
-
In the Family of Parts Edit Table, click the New button
. -
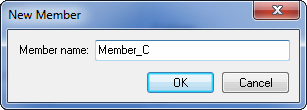
In the New Member dialog box, type Member_C as the name of the new family member, and then click OK.
In the edit table, notice that a new column is added for Member_C.
Observe the edit table
Notice that there are columns for each family member, and rows for Design Intent, Ordered Features, Constructions, and Variables.
At this point, new members A, B, and C are the same as the master.
© 2021 UDS