Activity: Construct features in the ordered environment
Construct features in the ordered environment
In this activity, sketch a profile, and then use the Cut, Draft, and Round commands to create ordered features. Because the same commands are used, compare sketching and feature creation behavior in the ordered environment with what was learned in the synchronous environment.
Launch the Activity: Construct features in the ordered environment.
Draw a profile for an ordered cutout
-
Switch to the Ordered environment by clicking the Ordered bar in PathFinder.
-
Draw a cutout profile. On the Home tab→Sketch group, choose the Sketch command
 .
. -
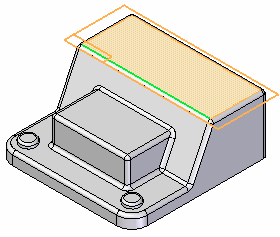
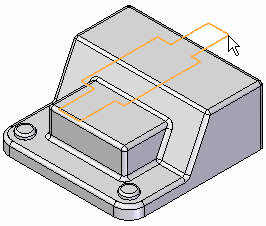
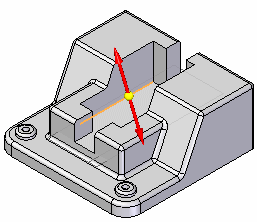
Position the cursor over the sketch plane shown below. Press N until the green edge on the model matches the green edge highlighted below. Click to orient the sketch plane with the green edge as the X axis.
-
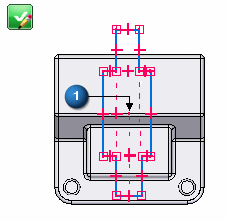
Draw and dimension the profile as shown. Apply an equal relationship to the four horizontal sketch elements (2). Apply an equal relationship to the two vertical sketch elements (3).
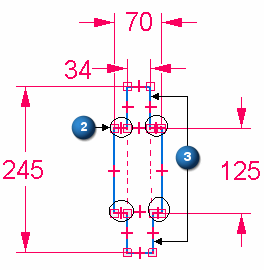
The profile should be centered both horizontally and vertically on the midpoint (1) of the edge.
-
When complete, click the green check in the sketch window. Click Finish.
Construct an ordered cutout
-
On the Home tab→Solids group, choose the Cut command
 .
. -
On the Cut command bar, click the Select from Sketch option in the select sketch plane list.
-
Select the sketch.
-
Right-click to accept the sketch.
-
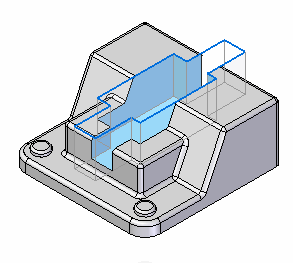
On the command bar, select the Finite Extent button, type 60 in the Distance field and press Enter.
-
Position the cursor below the sketch to define direction for the cut, and then click to create the cutout.
-
On the command bar, click Finish.
-
In PathFinder, turn off the sketch display.
Add draft to the ordered cutout
-
On the Home tab→Solids group, choose the Draft command
 .
. -
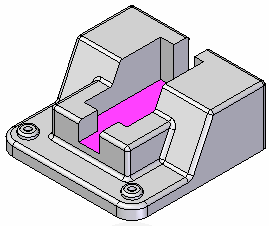
Select the highlighted plane as the draft plane.
-
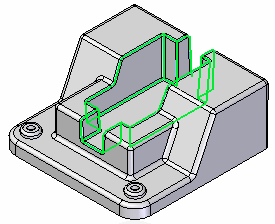
Select each face of the ordered cutout feature.
-
On the command bar, type 3 for the draft angle and then click Accept. Click Next.
-
Position the draft direction arrow as shown and then click. Click Finish.
Add round to the drafted cutout edges
-
On the Home tab→Solids group, choose the Round command.
-
On the command bar, type 3 for the round radius value.
-
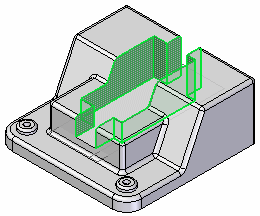
Select all edges of the cutout and then right-click to accept selected edges.
-
Right-click to preview and then right-click to finish.
Add round to the circular boss edge
-
Choose the Round command.
-
On the command bar, type 5 for the round radius value.
-
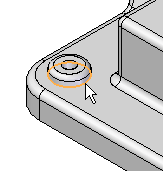
Select the bottom edge of the boss.
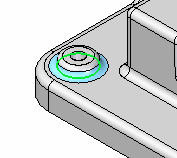
Notice that the synchronous face on the boss is consumed.
-
Round the other circular boss edge.
| Activity: Edit synchronous and ordered features |
© 2021 UDS