Activity: Edit synchronous and ordered features
Edit synchronous and ordered features in the ordered environment
In this activity:
-
Edit the model by dragging synchronous faces.
-
Change the size of an ordered cutout by editing PMI dimensions.
-
Replace synchronous faces using a construction surface.
-
Convert an ordered feature to a synchronous feature.
Launch the Activity: Edit synchronous and ordered features.
Observe the synchronous and ordered features
-
In PathFinder, click the Synchronous bar to switch to the synchronous environment.
Notice that the ordered features do not appear. Only synchronous features can be created in the synchronous environment. However, synchronous features can be edited in either environment.
-
Return to the ordered environment.
Edit the model
-
Select the face shown. This is a synchronous face that has been affected by an ordered cutout.

-
Select the move handle and move the face.
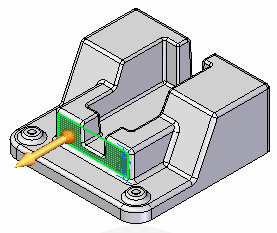
Notice that as the face exceeds the cutout boundary (sketch profile), faces are added for the cutout. The cutout definition remains unchanged.
-
Do not click. Press Escape to end the move.
-
Select the side face, which is a synchronous face. Select the move handle and observe the symmetric behavior.
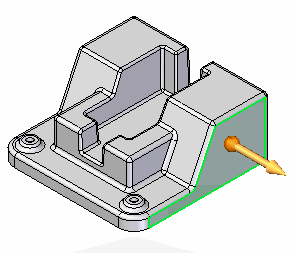
Notice that both synchronous and ordered elements participate in the move.
-
Do not click. Press Escape to end the move.
-
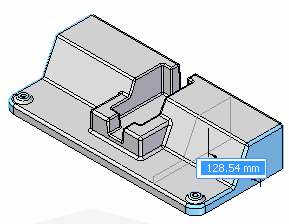
Move other faces of your choice. Do not click. Press Escape to end the move.
Edit the cutout
![]()
-
In PathFinder, right-click the ordered Cutout 1 feature.
-
On the shortcut menu, choose the Dynamic Edit command.
-
Change the 245 dimension to 210.
-
Change the 125 dimension to 100.
-
Change the 70 dimension to 90.
-
Change the 60 extent dimension to 40.
-
Press Escape twice to exit the feature edit.
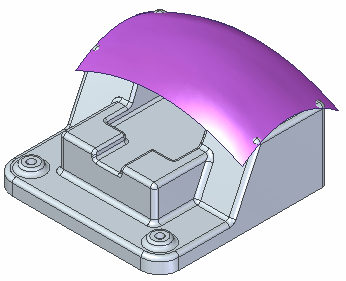
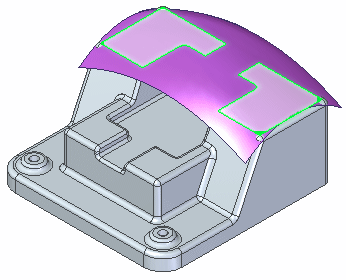
Apply a new face to the top face
Replace the top face with a construction surface.
-
In PathFinder, turn on the display of the surface feature named surface A.
-
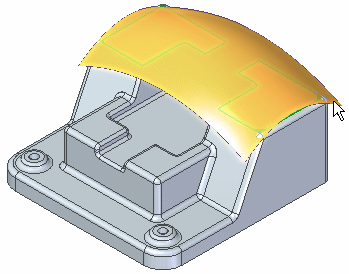
On the Surfacing tab→Modify Surfaces group, choose the Replace Face command
 .
. -
Select the top faces shown and accept.
-
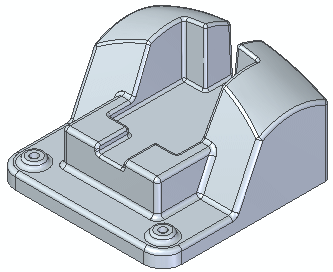
Select the construction surface and then on the command bar, click Finish.
Convert an ordered feature to a synchronous feature
This step is to show how to convert an ordered feature to a synchronous feature. Once the ordered featured is converted, it is no longer controlled by the sketch profile. The converted cutout feature becomes a collection of synchronous faces defining the cutout feature.
-
While in the ordered environment, in PathFinder, right-click the Replace Face feature.
-
On the shortcut menu, choose the Move to Synchronous command. All ordered features above the Replace Face are also converted to synchronous. The conversion is a one way process. Synchronous features can not be converted to ordered features.
-
Switch to the synchronous environment.
-
To observe the synchronous behavior of the converted cutout, select a face of the cutout feature and perform a move operation.
-
Save and close the file.
© 2021 UDS