Activity: Create schematic diagrams
Create schematic diagrams
In this activity you become familiar with the QY CAD blocks and connectors functionality.
Launch the Activity: Create schematic diagrams.
Open the activity file
-
Open ...\Program Files\UDS\QY CAD 2022\Training\seddasc.dft.
-
On the Application menu, choose Save As→Save As.
-
Save the file to a new name or location so the original file is available for other users.
Arrange the work space
To make it easier to work through this tutorial, first arrange the display of the QY CAD workspace.
To ensure the computer settings match the tutorial instructions, set options for the display and usage of 2D geometric relationships.
For this drawing, do not maintain or display geometric relationships. Geometric relationships control the orientation of an element with respect to another element. Connectors and blocks do not require that relationships are maintained, as they have their own built-in intelligence.
-
Click the Sketching tab, then in the Relate group, clear the Maintain Relationships option.
When the Maintain Relationships option is cleared, the button is no longer highlighted
 .
. -
Verify that the Relationship Handles option is also cleared
 .
.When the Relationship Handles option is cleared, relationship handles do not display on the drawing sheet, which reduces screen clutter.
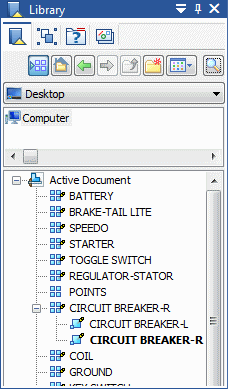
Display the Library tab
Use the Library tab to display and place existing blocks, and to specify the storage location for new blocks.
-
Choose Home tab→Select group→Select
 .
. -
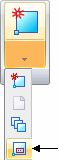
Click the Library tab
 .
.
-
On the Library tab, verify that the Show Blocks button
 is selected.
Use the Show Blocks option to view and place existing blocks, and to add new blocks to a different storage document than the active document.
Zoom in
-
At the bottom of the application window, on the Viewing Commands toolbar, click Zoom Area
 .
. -
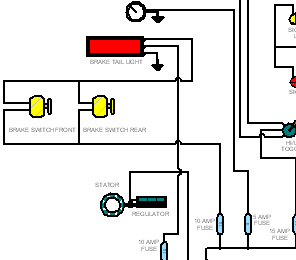
Click once above and to the left of the area shown next, and then click again below and to the right.
The view zooms into the area enclosed by this rectangle.
-
Right-click to exit the Zoom Area command.
Create a block label
Add a block label to the graphics for a block to create later. Block labels are intelligent text that can be placed with a block. When placing an occurrence of the block, the text for that occurrence can be edited.
-
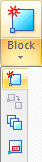
Choose Sketching tab→Blocks group→Block list→Block Label
 .
.
-
Fill in the dialog box as shown.

-
Click OK.
Place the block label
-
Position the cursor over the middle of the bottom line, as shown next, but do not click.

Notice that the block label text matches what was typed in the Name box for the block label.
-
When the midpoint relationship indicator appears
 , move the cursor below the graphics, then click to place the block label text, as shown next.
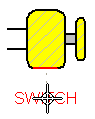
Select the graphics for the block
Use the Block command to create a block that includes the block label and graphics above the block label.
-
Choose Sketching tab→Blocks group→Block list→Block
 .
.
QY CAD displays the Block command bar.

-
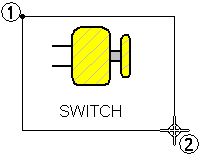
To select the graphics for the new block, position the cursor at point 1, press and hold down the left mouse button, and drag the cursor to point 2.
QY CAD highlights the graphics.
-
On the Block command bar, click Accept
 .
.
Define the block origin and name
-
Position the cursor as shown next, and when the endpoint relationship indicator
 appears next to the cursor, click to define the block origin.
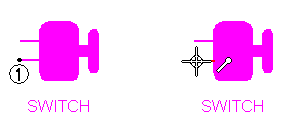
-
On the Block command bar, ensure that the Place Occurrence button
 is selected.
This option specifies that the selected graphics are replaced with an occurrence of the new block.
-
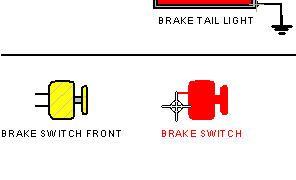
On the Block command bar, in the Name box, type BRAKE SWITCH.
-
Click Accept
.QY CAD creates a new block and adds it to the bottom of the blocks list for the Active document in the Library tab.
Also, because a block label was included for the block, QY CAD displays the Block Properties dialog box. Do not dismiss the dialog box.
Define the block properties
When creating a block that includes a block label, QY CAD displays the Block Properties dialog box so the Value attribute can be set for the first occurrence of the block. The first occurrence of the block replaces the original graphics.
-
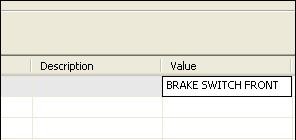
Double-click the Value cell, and type BRAKE SWITCH FRONT.
-
Click OK.
Select the block elements in the graphics window
When defining a set of elements as a block, the selected element set becomes the first block instance.
The block can be repositioned using the Select tool to drag the block to a new location.
Just the label text can be positioned by positioning the cursor over the label text origin point, and dragging.
To modify the elements individually for any block, use the Unblock command on the shortcut menu to unblock the elements.
-
Choose Home tab→Select group→Select
. -
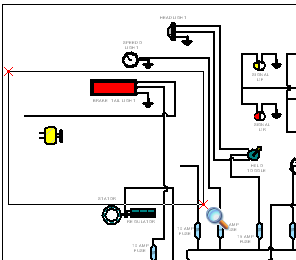
Position the cursor over one of the elements defined as a block, and then click.

QY CAD highlights all the elements as a group and displays a dot at the block origin point and another dot at the origin of the block label text.
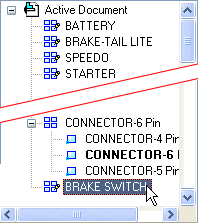
Find the Brake Switch block in the Library tab
-
On the Library tab, scroll through the list of blocks in the Active Document list until finding the entry for the Brake Switch just created.
-
In the list, click the entry for the Brake Switch block.
QY CAD displays the block graphics in a preview pane.
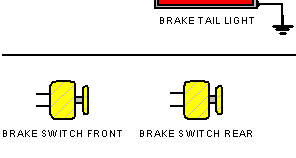
Place another instance of the block
-
On the Library tab, in the block list area, select the block named BRAKE SWITCH, hold down the left mouse button, drag the block into the graphics window, and then release the mouse button.
-
Do not click. Notice that the block is attached to the cursor at the origin point defined when creating the block.
-
Position the cursor as shown next, and then click to place a new copy of the block.
QY CAD displays the Block Properties dialog box, where the properties of the second occurrence of the block can be defined, as explained next.
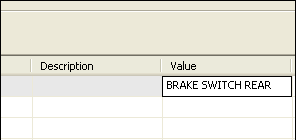
Define the block properties for the second block
-
Double-click the Value cell, and type BRAKE SWITCH REAR.
-
Click OK.
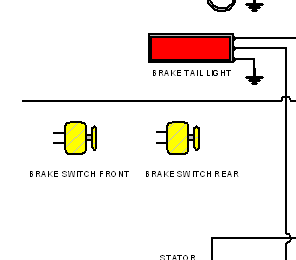
QY CAD updates the block graphics with the text specified.
-
To finish placing blocks, choose Home tab→Select group→Select
.
Save the file
-
At the top-left side of the application window, on the Quick Access toolbar, click Save
 .
.
© 2021 UDS