Display and edit PMI elements
| In this section: 4.3.1. Show All and Hide All commands (PMI elements) 4.3.2. Show or Hide commands (PMI elements) |
Most of the commands to manipulate the display of PMI annotations and dimensions are accessed through PathFinder. Some of these commands are also available on shortcut menus when an element is selected in the graphics window.
| To | Do this |
| Locate a PMI dimension or annotation in the graphics window. | Point to the PMI element name anywhere on PathFinder (for example, Balloon 1), and then look in the graphics window to see what is highlighted. |
| Show or hide all PMI annotations or dimensions in the document. |
Tip: A faster way to show and hide PMI elements is to use the check boxes in front of the element name. |
| Show or hide one PMI annotation or dimension in the 3D model graphics window. | On PathFinder, set or clear the check box in front of the PMI element name. |
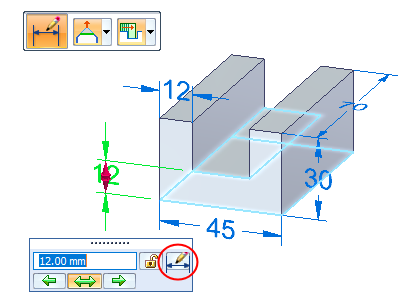
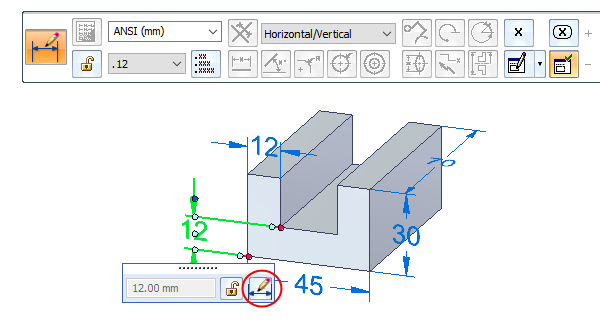
| Switch between editing the formatting or the value of a selected PMI dimension using the Modify button on the command bar. Tip: Depending on the dimension type and where you click, a single click can display all of the dimension editing functions, or display only the dimension value edit box. You also can use Alt+click to get the opposite behavior. See the table in Dimension value edit controls.
| To edit a driving dimension value:
|
| Change the side of the model affected by the dimension edit. This includes a symmetric edit. Note: See Using PMI dimension selection cursors in the PMI edit handles and cursors help topic. | In the graphics window:
|
| Change which of the following is shown in the document: PMI dimension values, names, or formulas. (This is not valid for annotations.) | Point to any dimension. Right-click and choose one of the following:
Note: These settings are mutually exclusive. If values are shown, then names and formulas are not. One of these must be shown at all times. |
| Move the dimension terminators. |
Tip: You also can |
| Move a PMI dimension or annotation. | |
| Rename an annotation or dimension. This renames the element wherever it occurs. |
|
| Delete an annotation or dimension. This removes it everywhere it is used. | On PathFinder, point to the PMI element name you want to delete, and from its shortcut menu, choose Delete. |
| Edit the properties of a PMI dimension or annotation. Example: You can apply fractional formatting to a linear dimension using the Units tab in the Dimension Properties dialog box.
To learn how to do this, see Format a fractional dimension. |
|
| Add property text to a PMI callout or balloon. |
|
| Copy and paste property text into a PMI dimension prefix. |
|
| Convert property text associated with a selected dimension or annotation to static text. | Point to the specific PMI element name (for example, Callout 3), and from its shortcut menu, choose Convert Property Text. |
| Convert all property text associated with PMI elements in the document to static text. | Choose PMI tab→Property Text group→Convert All. |
| Update all property text associated with PMI elements in the document. | Choose PMI tab→Property Text group→Update All. |
| Find all model views where a PMI annotation or dimension is used. | On PathFinder, point to a PMI element name. This highlights the PMI element name in all model view collections where it is used. |
| Add an annotation or dimension to a defined model view. |
|
| Remove an annotation or dimension from a defined model view. |
|
| Set default PMI text size. | |
| Change individual PMI element text size. | In the graphics window, right-click a PMI element, and then choose Properties. Change the Font Size option as follows:
|
| Change the colors of PMI driving and driven dimensions. Note: You cannot override PMI color through individual properties. To learn about the different colors used to display PMI on the model, see PMI dimension colors in the PMI dimensions and annotations overview. | On the QY CAD Application menu, click Settings→Options. On the Colors tab, do the following:
|
© 2021 UDS


 the terminator handle and choose the Flip Terminators command from the dimension format menu.
 .
. .
.