Text dialog box
Use the Text dialog box to specify the text and formatting options for a text profile. It is opened automatically when you choose the Text Profile command ![]() . You also can open it to edit existing text by clicking the Text Step button
. You also can open it to edit existing text by clicking the Text Step button  on the Text Profile command bar.
- Font
-
Lists the fonts installed on the computer. The selected font is applied to all text in the text profile.
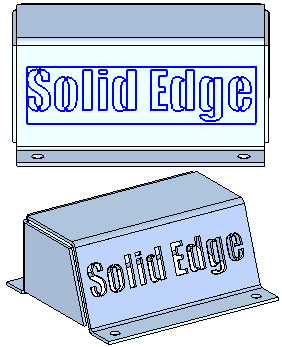
When creating text features that go all the way through a part, such as with sheet metal parts, we recommend using the font designed for manufacturing, QY CAD Stencil.
- Show only stick fonts in the list
-
Displays only stick fonts in the Font list. For more information, see Etching fonts, colors, and line styles.
- Script
-
Lists the available script fonts. The selected font is applied to all text in the text profile.
- Properties
-
You can create a text profile using both point size and font size. You can edit a text profile to change from one method to another at any time.
- Use font size as point size
-
The check box specifies whether to use the point size logic or the legacy method of determining the height of text in the text profile. In both cases, you must also specify the font size (in mm or inches) or the point size (in points).
-
When the check box is selected, the text height is based on the point size logic, which is calculated from the following dimensions:
1=Point Size (baseline to baseline)
2=Ascent
3=Descent
4=Leading

Point size is a relative measure, and may result in a smaller text profile height.
Example:
-
When the check box is deselected, the legacy method of determining text profile height is used. The legacy method does not use the point size parameters.
Example:
-
- Point Size
-
Point size is a relative measure of the size of a selected font. It measures the minimum distance between baselines (with leading) or between lines (without leading).
If you know what point size you want to use, select this option and enter a value in the adjacent box, for example, 10 or 12.
- Font Size
-
Font size measures the em height of a selected font, which is the distance from the descent to the ascent.
If you know what font size you want to use, select this option and enter a value in the adjacent box, in units of inches or mm, for example .25 in or 6.35 mm.
- Letter spacing (setting for entire text profile)
-
Lists and applies the amount of space between letters.
- Line spacing (setting for entire text profile)
-
Lists and applies the amount of vertical space between lines of text.
- Margin (setting for entire text profile)
-
Specifies the margin between the text and the border of the text box.
- Smoothing
-
Controls how smooth the text profile is. You can drag the slider up and down to make the text smoother or coarser.
- Property Text
-
 Property Text
 -
Opens the Select Property Text dialog box, which you can use to add associative text to the text profile. Accesses the general properties in the current document, as well as the properties in models attached to the current file.
- Format
-
Modifies the format of the property text string output value or text at the current cursor position in the Text box.
Displays the Format Values dialog box for you to choose the formatting. You can apply formatting to each valid property text string. The type of formatting you can apply depends on your cursor position when you select the Format button.
Example:For property text that extracts the file name or document title, you can change the text case to all UPPERCASE letters. For property text that extracts the date created, modified, saved or originated, you can apply month-day-time formatting.
For more information and examples, see Format property text values and Format codes to modify reference and property text output.
- Style (setting per-character)
-
 Makes selected text bold.
  Italicizes selected text.
 - Alignment
-
Specifies horizontal text alignment within the text profile box. Alignment can be set differently for each paragraph in a multiline text box and is based on text line length.
Alignment option
Result

Aligns the text string to the left side of the text profile box.

Centers the text string in the text profile box.

Aligns the text string to the right side of the text profile box.
Note:When the text box is placed, this Alignment setting works with the text box Anchor point set on the Text Profile command bar and the placement point you click in the graphics window to define the exact placement of the text profile box.
- Text
-
Type or copy and paste the text you want to appear on the part, feature, or drawing. The text box expands to fit the longest line of text you enter. Press Enter to start a new line and to create paragraphs within the text box.
If you add property text, the text box shows the property text string, and the Preview pane displays the actual value of the property text.
Note:When the property text in the Preview pane returns a value of No reference or Null, the text profile will show the same value in the document. When the property text has no value and only the property text string is displayed in the text profile edit box, it displays Error. Empty values may be displayed when values are available for some but not all properties.
- Apply
-
Applies edits to the text. This control is available only when you are editing an existing text profile.
Note:To edit an existing text profile, select the text in the graphics window or on the drawing, and then click the Text Step button on the command bar.
- Save as Default
-
Saves the current dialog box settings as the default settings for future sessions.
- Preview
-
Shows or hides the preview window on the right side of the Text dialog box.
The text profile preview updates dynamically with your changes.
© 2021 UDS