Activity: Creating a conductor table
Creating a conductor table
This activity guides you through the creation of a conductor table.
Click here to download the activity file.
Launch the Activity: Creating a conductor table.
Open the activity file
-
Click the
 Application button → Open → Browse.
 -
In the Open File dialog box, set the Look in: field to the folder where the training files reside.
-
Click nailboard_activity_2.dft and then click Open.
Create a conductor table
-
Click the Diagram tab→Tables group→Conductor Table command
 .
. -
Click the nailboard view.

-
Drag the cursor to the approximate location shown in the illustration.
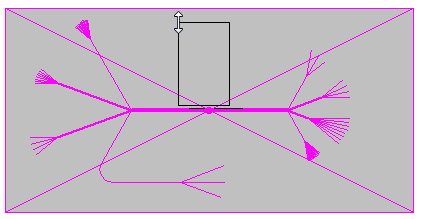
-
Click to place the conductor table.

-
This completes the activity. Close the draft document without saving. Proceed to the activity summary.
Activity Summary
In this activity you created a conductor table based on wire harness information stored in a nailboard view.
 Click the Close button in the upper-right corner of the activity window.
© 2021 UDS