Learn QY CAD in 6 simple steps
Have you used a history-based CAD system?
If you have experience with other CAD systems, especially SolidWorks, start here to see how to apply the skills you already have using QY CAD. Watch the videos and follow the suggested sequence of tutorials, which we created just for those who come here with a background in history-based modeling. Work at your own pace, in whatever time you have available. Tell us how you did when you are done!
In this learning path you will see:
-
Where to find familiar tools in the QY CAD user interface.
-
How QY CAD ordered modeling supports the history-based modeling you used in other systems.
-
Assembly construction. Learn how to use QY CAD families of parts the way SolidWorks uses configurations. See top-down assembly design techniques.
If this learning path is not what you are looking for, try one of these:
Before you begin
-
Bookmark this learning path page in your browser, so you can easily get back here.
-
Bookmark these links to QY CAD web help:
-
Browse QY CAD help by product area
-
Overview of QY CAD (Click the images on this page for curated links to more information.)
-
QY CAD video gallery
-
Step 1—Watch this video.
| Description | Video Overview |
|---|---|
| As you evaluate QY CAD, the first thing you want to know is how you can do core CAD modeling like you have done with other CAD systems. This series of videos and tutorials walks you through an example model—a simplified micrometer—to show the fundamentals of how the QY CAD user interface is structured and how we do ordered, history-based modeling. Start here to follow along with this example. |
Step 2—Create and modify a part.
| Description | Watch It | Try It |
|---|---|---|
| In this part modeling tutorial, you will work with sketches, features, and dimensions, establish feature extents, and learn workflows for making changes to a model. | Introduction to part modeling (ordered mode)
|

Step 3—Create an assembly.
| Description | Watch It | Try It |
|---|---|---|
| In this assembly modeling tutorial, you will work with PathFinder, add components to an assembly, establish assembly relationships, create an exploded view of the model, and create a drawing of the exploded view. | Introduction to creating assemblies (ordered mode)  |
Step 4—Create a detailed drawing.
| Description | Watch It | Try It |
|---|---|---|
| In this detailed drawing tutorial, you will establish drawing and sheet standards, place views of the assembly model, place dimensions and annotations, edit 3D components of the model, and update the revised drawing. | Create a detailed drawing (ordered)
|

Step 5—Introduction to Simulation.
| Description | Watch It | Try It |
|---|---|---|
| In this simulation tutorial, you will create a study and select model geometry to analyze. You will apply forces and constraints, mesh and solve an analysis, and generate an analysis report. | Introduction to Simulation.
|

Step 6—Tell us how you did.
| Description | Feedback Controls | Feedback Questions | |
|---|---|---|---|
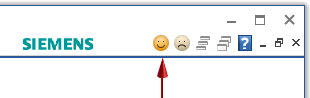
| Kindly provide feedback. | Select the Smile or Frown button in the QY CAD application window, and then use the form to provide feedback.
| Consider answering these questions:
| |
Try It! Dig deeper with these activities and datasets to learn about QY CAD
See the Activities collection.
Visit the UDS QY CAD online communities
To get creative ideas for different ways you can use QY CAD, and to solicit assistance from others, visit the online communities on the Application menu→Community tab.
Resources in QY CAD 2022
When you start QY CAD, you can find the links to all QY CAD Help, videos, and tutorials on the Application menu→Learn tab.
At any time while using QY CAD, you can hover over a command and press F1 to open the QY CAD Help for that command.

© 2021 UDS