Assembly environment overview
Observe the current assembly
![]()
In the next few steps, familiarize yourself with the assembly document.
Learn how to highlight and select assembly components using PathFinder.
Launch the Assembly environment overview activity.
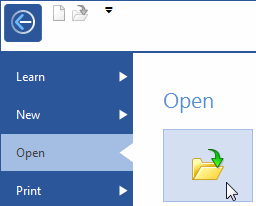
Open an assembly
-
Choose Application menu→Open.
-
On the Open tab, click the Browse command to browse to a document.

The Open File dialog box displays.
-
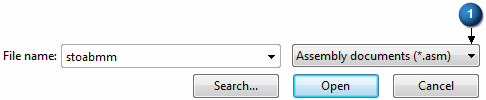
Navigate to the QY CAD training folder. The default location is:
C:\Program Files\UDS\QY CAD 2022\Training
-
Open the assembly model document—
-
Set the Files of type (1) list to Assembly documents (*.asm).
-
Click stoabmm.
-
Click the Open button.
-
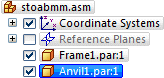
Display PathFinder
PathFinder should already be displayed. If not, follow these steps to display it.
-
On the Application menu, click Settings→Options.
The QY CAD Options dialog box displays.
-
Click the Helpers tab, and ensure the Show PathFinder in the document view option is selected.
Tip:Use PathFinder to review and edit the assembly structure, hide and display assembly components, such as parts, subassemblies, coordinate systems, and reference planes.
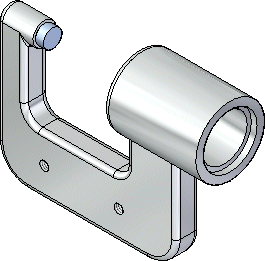
Highlight the frame part

![]()
-
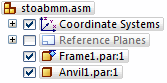
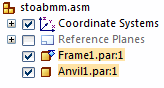
In the top pane of PathFinder, position the cursor over the Frame1.par entry, but do not click.
Notice that the frame part display changes color in the assembly window.
-
Move the cursor away and notice that the display returns to the previous color.
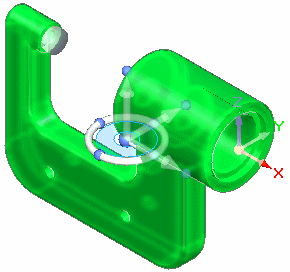
Select the frame part
-
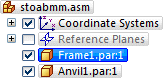
In PathFinder, position the cursor over the frame part again, then click, and move the cursor away.
-
If a command bar with edit commands obscures the view, drag the command bar to the side, out of the way.

-
Observe the following:
-
The part color in the graphics window changes to a different color than in the previous step.
-
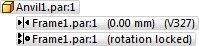
When selecting the part, the bottom pane of PathFinder displays the assembly relationships used to position the part, as shown below.

-
Since this was the first part placed in the assembly, the ground relationship symbol
 is displayed.
Note:If you cannot see the relationship symbols, use the scroll bar to move them into view, and drag the top of this display area higher, to make more room for them.
-
When working in assemblies, you can temporarily highlight components using PathFinder, and also select them.
Select the anvil part
-
In PathFinder, position the cursor over the anvil part, then click, and move the cursor away.
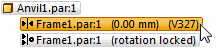
Notice that when selecting the anvil part, the bottom pane of PathFinder displays the two assembly relationships used to position the part, as shown below.
A mate relationship  and an axial align relationship
  were used to position the part with respect to the frame part.
Highlight the relationships in PathFinder
-
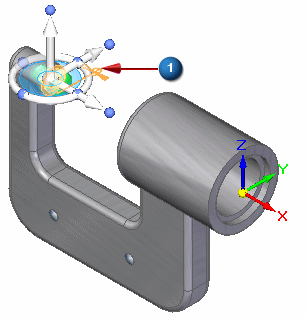
Position the cursor over the first assembly relationship in the bottom pane of PathFinder as shown in the top illustration, but do not click.
Notice that the two faces used to position the anvil part highlight in the graphics window, along with a symbol (1) representing the relationship between them.
-
Notice that shaded boxes display around the two parts in the top pane of PathFinder, as shown below.
These display clues make it easy to evaluate how an assembly was constructed.
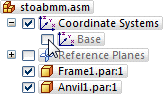
Display the coordinate systems collection
-
In the graphics window, click in free space to deselect the anvil part.
-
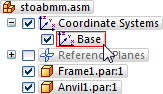
In PathFinder, position the cursor over the "+" symbol adjacent to the Coordinate Systems collector, and click.
An entry for the Base coordinate system displays.
 Tip:
Tip:There is one Base coordinate system in an assembly document, located at the center of the design space. Any additional coordinate systems defined are added to the Coordinate Systems collector in PathFinder.
Hide the coordinate system
-
In PathFinder, position the cursor over the check mark adjacent to the Base entry, and then click.
The coordinate system is hidden in the graphics window, as shown below.
Notice that the text in PathFinder for the Base entry has changed color.
-
Use the check boxes in PathFinder to display and hide assembly components.
The individual entries in PathFinder also change color to indicate the current status of the assembly components.
Fit the view
![]()
-
Choose Fit
 to fit the contents of the view to the graphics window.
Congratulations, the first step in this tutorial is complete: Getting familiar with the current state of the assembly and learning about PathFinder options in an assembly document.
© 2021 UDS