Activity: Construct the solid geometry
Constructing solid geometry
![]()
This activity:
-
Uses the Select tool to construct sketch-based solid geometry
-
Uses specialized feature construction commands to construct solid features
Launch the Activity: Construct the solid geometry.
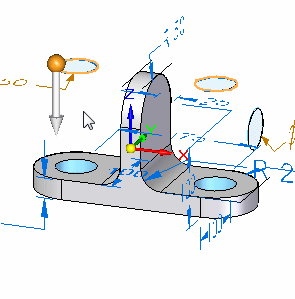
Start the Select command and select the sketch region
-
Choose the Home tab→Selection group→Select command
 .
. -
Position the cursor over the sketch region as shown, then click to select it.
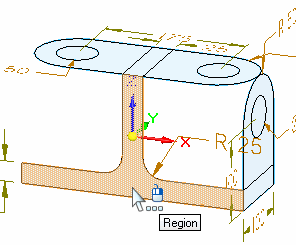 Note:
Note:Depending on the current settings on your computer, the sketch region may highlight as a shaded element or only the edges may highlight.
In the next few steps, you will learn about the on-screen tools that were displayed when you selected the sketch.
Observe the on-screen tools
![]()
Notice the following, as shown in the illustration:
-
A floating menu, called command bar (A) is displayed in the graphics window. The command bar displays a list of possible actions and the available options for the current action.
-
An Extrude handle (B) is displayed on the sketch region, near where you selected it. The Extrude handle is used to construct the feature.
Ensure the proper options are set on the command bar
![]()
-
On the command bar, ensure the following options on your computer match the illustration:
(A) The Extent Type option is set to Finite.
(B) The Symmetric Extent option is cleared (not set).
(C) The Keypoints option is set to End Point.

Ensure the other options match the illustration as well.
Select the Extrude handle and define the base feature extent
-
Position the cursor over the extrude handle as shown, and when it highlights, click the left mouse button.

-
Move the cursor back and forth and notice that the feature is drawn dynamically as you move the cursor.
-
Position the cursor behind the sketch, as shown. When the endpoint relationship indicator is displayed adjacent to the cursor, click.
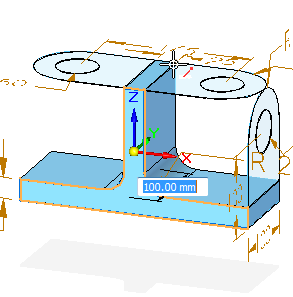
Also notice that a dynamic input box is displayed in the graphics window.
You have completed the base feature.
Observe the results
![]()
Your graphics window should resemble the illustration. Notice that:
-
A solid base feature is displayed and that the sketch you selected is no longer displayed.
-
Some of the dimensions have changed color.
When you construct sketch-based features using drawing view geometry, the drawing dimensions are attached to the model edges when possible. The dimensions that are blue were automatically converted to 3D PMI dimensions and are attached to the appropriate model edges.
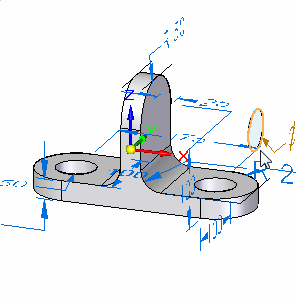
Construct a cutout
![]()
In the next few steps, you will construct the cutout shown in the illustration.
-
Choose the Home tab→Solids group→Extrude command
 .
.
You can use the Extrude command to construct features that add material to or remove material from the part.
Set the command bar options and select the sketch
![]()
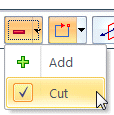
On the Extrude command bar, set the following options:
-
Set the Selection Type option to Chain.

-
Set the Add/Cut option to Cut.
-
Set the Extent Type option to Through All.

-
Position the cursor over the sketch shown in the illustration. When the sketch highlights, click to select it.
Accept the selected sketch element
![]()
-
Right-click to accept the element.
As you move the cursor around the window, you may see a warning symbol displayed.
![]()
You will use the sketch you just selected to cut away portions of the existing model. But appropriate results cannot be produced with options set the way they are now, and this symbol is displayed to let you know that you must change some options to get good results.
In the next step, you will change the Side Step option to resolve this.
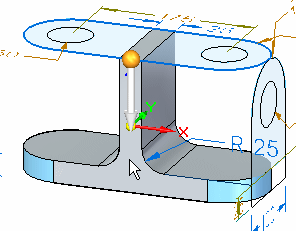
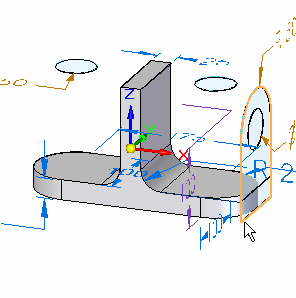
Specify the extent direction of the cutout
-
On the Extrude command bar, click the Side Step button
 .
. -
Move the cursor above the sketch. Notice that an arrow follows the cursor, showing the side of the sketch from which material will be removed.
A warning symbol
 is displayed when the arrow points above the sketch. There is no material to remove above the sketch, so this operation would not succeed.
 -
Move the cursor below the sketch, as shown, so that material is removed toward the bottom of the part, and click.
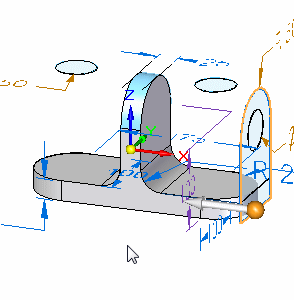
Observe the results
![]()
Your model should resemble the illustration. Notice that more dimensions have changed color.
Construct another cutout
-
Choose the Home tab→Solids group→Extrude command
. -
On the Extrude command bar, set the following options:
-
Set the Selection Type option to Chain.
-
Set the Add/Cut option to Cut.
-
Set the Extent Type option to Through All.
-
In the next few steps, you will construct another cutout, as shown.
![]()
Select and accept the sketch
-
Position the cursor over the sketch shown, then click to select it.
-
Right-click to accept the sketch.
Specify the extent direction of the cutout
-
On the Extrude command bar, click the Side Step bar
. -
Position the cursor as shown, then click to define the extent direction.
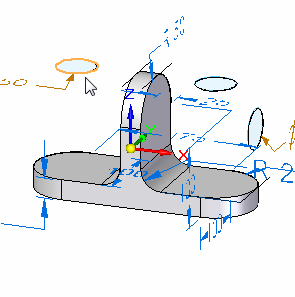
Observe the results
![]()
Your model should resemble the illustration.
Construct another cutout
-
Choose the Home tab→Solids group→Extrude command
. -
On the Extrude command bar, set the following options:
-
Set the Selection Type option to Chain.
-
Set the Add/Cut option to Cut.
-
Set the Extent Type option to Through All.
-
In the next few steps, you will construct the circular cutout shown.
![]()
Select and accept the sketch circles
-
Position the cursor over the sketch circle on the left, as shown, then click to select it.
-
Position the cursor over the sketch circle on the right, as shown, then click to select it.
-
Right-click to accept the element.
Specify the extent direction of the cutout
-
Position the cursor as shown, then click to define the extent direction.
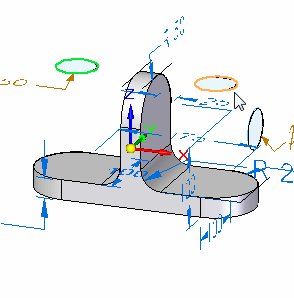
Observe the results
![]()
Your model should resemble the illustration.
Construct another cutout
-
Choose the Home tab→Solids group→Extrude command
. -
On the Extrude command bar, set the following options:
-
Set the Selection Type option to Chain.
-
Set the Add/Cut option to Cut.
-
Set the Extent Type option to Through All.
-
In the next few steps, you will construct the circular cutout shown.
![]()
Select and accept the sketch circle
-
Position the cursor over the sketch circle shown, then click to select it.
-
Right-click to accept the sketch.
Specify the extent of the cutout
-
Position the cursor as shown, then click to define the extent direction.

Observe the results
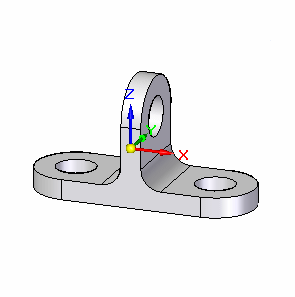
![]()
Your model should resemble the illustration.
Hide the PMI dimensions and sketches
-
In PathFinder, clear the PMI check box.
-
Clear the Sketches check box to hide the unused sketches.
Save the file
-
On the Quick Access toolbar, click the Save button to save the work you have done so far
 .
. -
Save the part to a meaningful folder and name.
© 2021 UDS