Activity: Place another support part in the assembly
Place another support part
This activity:
-
Places another support part in the assembly
Launch the Activity: Place another support part in the assembly.
Open the assembly file
-
Open the assembly saved in the previous activity, if it is not already open.
Prepare to place another support part
![]()
In the next few steps, place another support part on the other side of the base plate, as shown in the illustration.
Use the same steps you used to place the first support part.
Place another support part in the assembly
![]()
-
Click the Parts Library tab in PathFinder
 .
. -
Drag another support1.par part from the Parts Library tab and drop it into the assembly at the approximate location shown.
Use FlashFit to first apply a mate relationship between the bottom face of the support and the top face of the base plate.
![]()
Select the mating face on the support
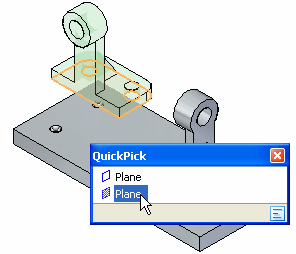
-
Use QuickPick to select the bottom face on the support shown.
Select the mating face of the base plate part
![]()
-
Select the top face on the base plate as shown.
Observe the result
![]()
The faces selected are mated.
Select the face to align on the support part
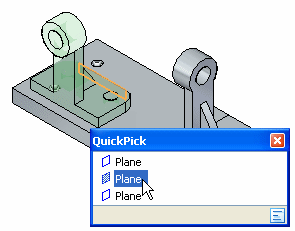
-
Use QuickPick to select the planar face on the support shown.
Specify a floating offset
![]()
-
Click the Floating Offset button.
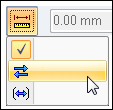
Remember, this setting allows the faces being aligned to take on whatever offset value is appropriate to satisfy the axial align relationship applied later.
Select the aligning face on the part in the assembly
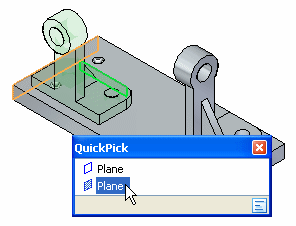
-
Use QuickPick to select the planar face on the base plate shown.
Observe the result and flip the support part
![]()
The second support part is positioned in the assembly approximately as shown in the top illustration.
Again, FlashFit applies the relationship that requires less part rotation, a mate relationship.
For this part, a planar align relationship is also required.
-
Click the Flip button to change the mate relationship to a planar align relationship.

The part is repositioned approximately as shown in the bottom illustration.
![]()
Select the cylindrical axis to align on the support part
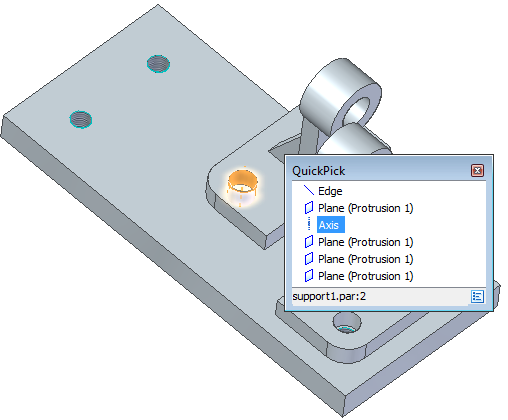
-
Use QuickPick to select the axis on the support as shown.
Select the cylindrical axis to align on the base plate part
![]()
-
Select the cylindrical axis on the base plate as shown.
Observe the result
![]()
The cylindrical faces on the support and base plate are axially aligned.
The second support part is fully positioned within the assembly.
Save the assembly
![]()
-
Click Save
 .
.
© 2021 UDS