Tutorial: Copy and paste simulation items across part files
-
Open two model documents.
-
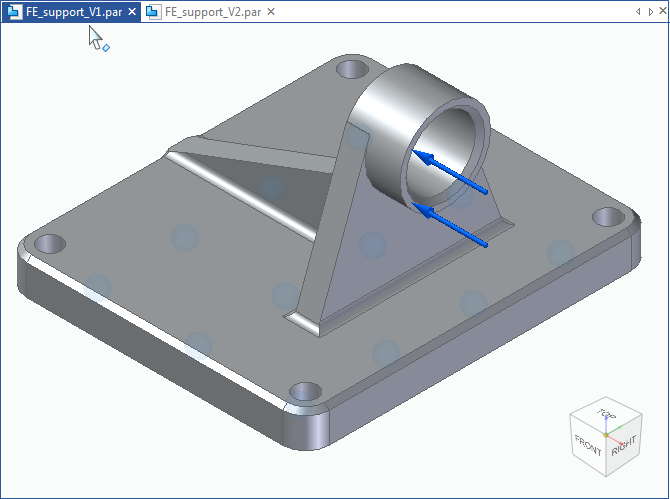
Open the existing file named FE_support_V1.par.
Simulation models are delivered in the \Program Files\UDS\QY CAD 2022\Training\Simulation folder.
-
Also open FE_support_V2.par.
-
-
Copy the load and constraint from one file to the other.
FE_support_V1.par contains a force load and a fixed constraint. FE_support_V2.par contains a study but no loads and constraints.
-
Click the document tab containing FE_support_V1.par to make it the active document window.
-
In the Simulation pane, Ctrl+click the Force 1 load and the Fixed 1 constraint so that they are both highlighted, and then press Ctrl+C.
-
Click the document tab containing FE_support_V2.par to make it the active document window, and with your cursor on the document tab press Ctrl+V.

Now you see the load and constraint copied to the part, FE_support_V2.par, and the Simulation pane for FE_support_V2.par shows the copied load and constraint.
-
-
Mesh and solve FE_support_V2.par.
-
Select Simulation tab→Solve group→Solve.
After a few moments, you see the results.
-
Rotate the model to view the results on the back.
-
(Optional) Change the document view back to FE_support_V1.par, and then mesh and solve it.
After a few moments, you see the results.
-
Rotate the model to view the results on the back.
-
Notice the results are different for FE_support_V1.par than for FE_support_V2.par. This is due to the structural difference in the support on the back side of the mount.
-
Save and close each of the files:
-
On the Quick Access toolbar, click Save.
-
On the document window tab, right-click and choose Close Window, or click the X button.
-
In this tutorial, you copy a load and a constraint from one part file to another using Ctrl+C and Ctrl+V. You can use this technique when you want to compare study results for two parts that are slightly different in size, but otherwise use the same study boundary conditions and material.
If you wanted to compare studies for the same model but with slightly different inputs, use the Create Copy shortcut command to duplicate the entire study within the same document. You can then modify a load or constraint and solve the study with the modified boundary condition. For more information, see Copy and paste studies or individual simulation objects.
© 2021 UDS