Activity: Creating rounds and mirroring features
Creating rounds and mirroring features
In this activity you will round edges on a model, mirror and copy features, and understand editing options on a feature.
Launch the Activity: Creating rounds and mirroring features.
Round more edges
![]()
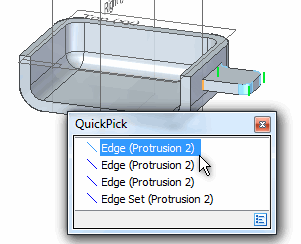
In the next few steps, round the four edges shown in the illustration.
-
Choose the Round command
 .
. -
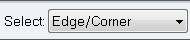
On the Round command bar, set the Select option to Edge/Corner. With this option, you can select edges and corners to be rounded.
-
On the Round command bar, in the Radius box, type 8, and then press the Enter key.
Select the edges to round
-
Select the four edges shown. You may need to use QuickPick to select the edges.
After you select the edges, your model should look like this:
![]()
Preview the feature
-
On the Round command bar, click the Accept button
 .
. -
On the Round command bar, click the Preview button
 .
.
Finish the round
![]()
-
When you are satisfied with your results, click Finish
 on the Round command bar.
Save the part
![]()
-
On the Quick Access toolbar, click the Save command
 to save the work you have done so far.
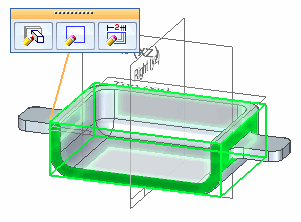
Mirror and copy features
![]()
You will now mirror and copy the protrusion and round features you constructed to add identical features to the opposite side of the part.
This is easy because you took advantage of part symmetry when you constructed the base feature.
-
On the Home tab→Pattern group, click the Mirror list button. Choose the Mirror Copy Feature command
 .
. -
On the Mirror Copy Feature command bar, click the Smart button
 .
.
Select the features to mirror
-
In PathFinder, select the Protrusion 2 and Round 2 features.
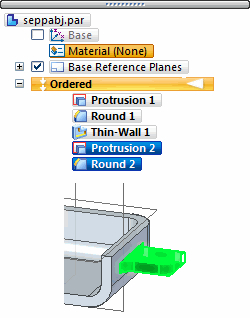
Notice that the features highlight in the graphics window.
-
On the Mirror Copy Feature command bar, click the Accept button
. This tells the system that the features you selected are the only ones you want to mirror.
Specify the mirror plane
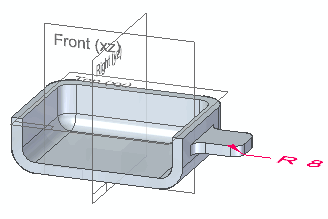
During the Plane Step of the Mirror Copy Feature command, you specify the plane of symmetry for the new mirrored feature.
-
In the graphics window, select the base reference plane shown.
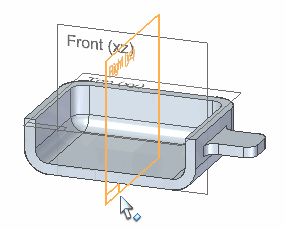
The features you selected are copied and mirrored to the other side of the part.
![]()
Finish the copy
-
On the Mirror Copy Feature command bar, click the Finish button
to complete the feature.
![]()
Fit and save the part
![]()
-
Choose the Fit command to fit the contents of the view to the graphics window.
-
Choose the Save command to save the work you have done so far.
You have completed all the steps for modeling the part.
In the next few steps, you learn how to edit the features of the part.
Select a feature to edit
-
On the Home tab→Select group, choose the Select command
 .
. -
You edit features by selecting them in the graphics window or in PathFinder.
On PathFinder, position the cursor over the Protrusion 1 entry, then click.
Notice that the Edit Feature box appears on the feature.
Also notice in the graphics window that the feature changed color.
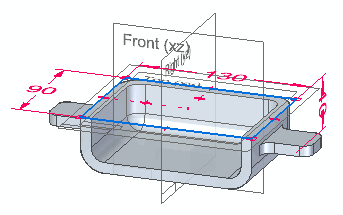
Explore the editing options
Take a few moments to review the options you have for editing this feature:
| The Edit Definition button allows you to return to any of the inputs used to create the feature. | |
| The Edit Profile button displays the profile true view, and allows you add or delete profile elements, dimensions, or geometric relationships. | |
| The Dynamic Edit button displays the profile and its dimensions, while leaving the model in its current state. |
For this edit, you will be editing the value of a dimension, so the Dynamic Edit option is appropriate.
-
On the Feature Edit box, click the Dynamic Edit button
 .
.Notice that the profile, its dimensions, and the profile plane are displayed in the graphics window.
Edit the feature
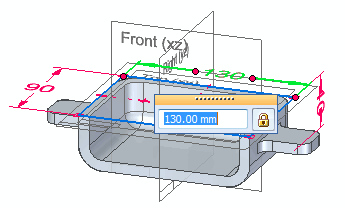
![]()
-
In the graphics window, select the 130 mm dimension. If required, use QuickPick to select the dimension.
-
In the Dimension Value Edit box, type 110, then press the Enter key.
Notice the model size updates, and the features you copied and mirrored also update their position.
Continue editing dimensions
![]()
Edit the following dimensions, as shown in the illustration:
-
(1) Select the 90 mm dimension, then in the Dimension Value Edit box, type 120, and press the Enter key.
-
(2) Select the 40 mm dimension, then in the Dimension Value Edit box, type 60, and press the Enter key.
Save the part
![]()
-
Choose the Save command
to save the completed part.
© 2021 UDS