Activity: Add assembly cutout feature
Add assembly cutout feature
In this activity you will learn how to place an assembly cutout feature.
Launch the Activity: Add assembly cutout feature.
Display the assembly sketch and fit the view
-
On the Viewing commands toolbar, click Fit
 .
. -
Choose the Home→Select→Select command
 .
. -
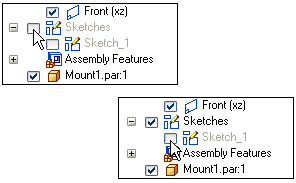
In PathFinder, click the "+" symbol adjacent to the Sketches collector to display the list of sketches.
-
Position the cursor over the check box adjacent to the Sketches collector, as shown in the top-left illustration, then click to enable the Sketches collector.
-
Position the cursor over the Sketch_1 entry, then click to display the circular sketch in the graphics window.
In the next few steps, you will construct an assembly cutout feature using an existing assembly sketch.
Construct a Cutout
-
Choose the Features→Assembly Features→Cut command
 .
. -
On the Features Options dialog box, set the Create Assembly Features option and click OK.
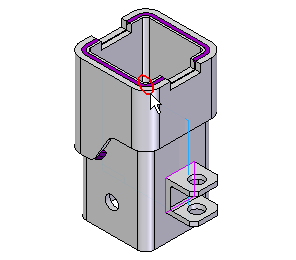
Select a profile
-
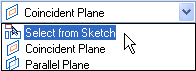
On the Cut command bar, in the Create-From Options list, click the Select From Sketch option.
-
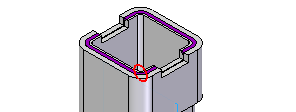
Position the cursor over the circle shown. When the circle highlights, click.
Accept the selected sketch element
![]()
In addition to clicking the Accept button, you can also accept the sketch element by right-clicking.
-
Right-click to accept the sketch element.
Note:The cursor must be in the QY CAD window to accept the sketch element by right-clicking.
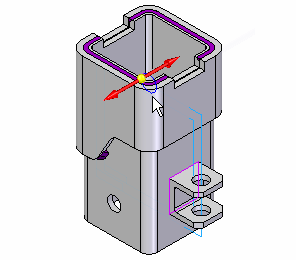
Specify the cutout extent and direction
-
On the Cutout command bar, choose Through All
 .
. -
Move the cursor over the profile so that the extent arrows point both left and right, and then click to accept.
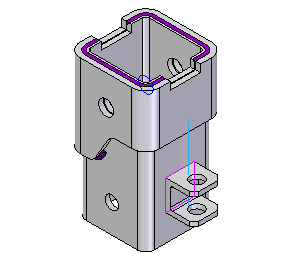
Accept the selected parts
![]()
Notice that several of the assembly parts are automatically selected for the cutout. All the selected parts are appropriate for this cutout.
-
On the command bar, click Accept
 .
.
Finish the cutout
![]()
-
On the command bar, click Finish.
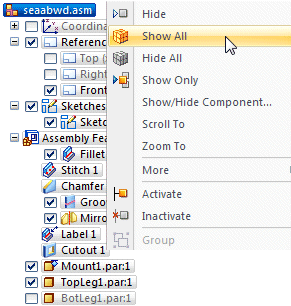
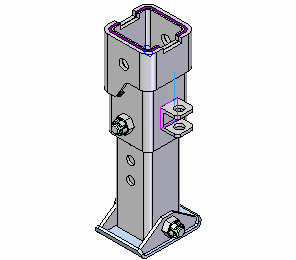
Display all the parts and fit the view
-
Choose the Home→Select→Select command
. -
In the PathFinder tab, position the cursor over the Seaabwd.asm entry, then right-click to display the shortcut menu.
-
On the shortcut menu, choose Show All.
-
On the Viewing commands toolbar, click Fit
.
Save the file
-
On the Quick Access toolbar, click Save
 .
.
-
Close the file.
© 2021 UDS