Activity: Create a tube
Create a tube
In this activity you will create a tube using a path you defined in the previous activity. You will define properties and save the parts.
Launch the Activity: Create a tube.
Create the tube
![]()
-
Choose the Home →Tubing→Tube command
 .
.
Set the tube options
-
If the Tube Options dialog box is not displayed automatically, click the Tube Options button
 .
. -
In the Template box, click Browse to select the Iso Metric Part.par template.
-
In the File location box, click Browse to specify the folder where you want to save the file, for example: C:\Drawing Files.
-
In the File name box, type Tube1.
-
For the Bend Radius, clear the Use Default Value option, then type 20.00 mm for the bend radius value.
-
For the Outer Diameter, clear the Use Default Value option, then type 15.00 mm for the outer diameter value.
-
Click OK.

Examine the Tube options
![]()
Examine the Tube options:
|
| The Tube Options button displays the Tube Options dialog box, which allows you to specify information about the tube part, such as file name, material, bend radius, and diameter. |
| The Path Step specifies the 3D path along which you want to create the tube. You are in this step in the tutorial. | |
| The End Treatment Step defines the extent of the tube ends and any end treatment you want. |
Select the tube path
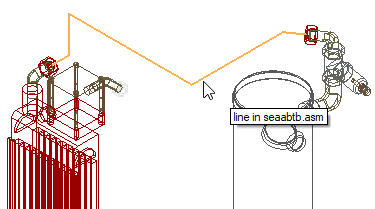
-
Select the tube path shown the illustration, then click
 .
.
Edit the extents of the tube
-
Click the End Treatment Step button
 .
.Notice you have the option to extend the two endpoints of the tube. This allows for end treatments such as extensions for flaring.
-
In the End 1 and End 2 boxes, type 5, then press Enter.
![]()
Finish the tube
![]()
-
Click
 .Note:
If the Tube Options dialog box is displayed again, click Cancel to dismiss it.
Fit the view
![]()
-
Choose the Fit command
 to fit the contents of the view to the graphics window.
Create a bend table
-
Choose the Tools→Assistants→Bend Table command.
-
Click Select All Tubes
 .
. -
Click
.
![]()
A bend table is an ASCII text file that contains manufacturing information for a selected tube or all tubes in the assembly.
Save the bend table
-
Click Browse to select the folder where you want to save the file. For example, C:\My Documents\Drawing Files.
-
On the Bend Table dialog box, click
 .
.
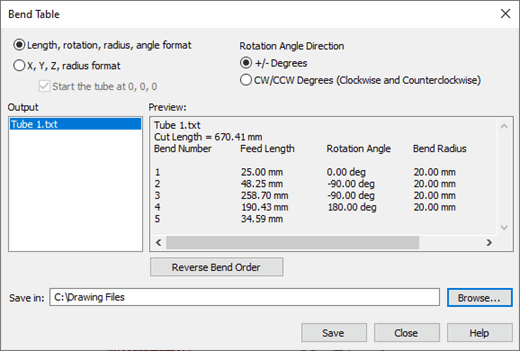
The Bend Table dialog box displays information about the bends. You can save the information to an ASCII text file.
Return to the Assembly environment
![]()
-
Choose the Home→Close→Close XpresRoute
 command to close the profile window.
Save the file
![]()
-
On the Status bar at bottom-right of the application window, click the View Styles button
 .
. -
On the View Styles palette, click the Shaded With Visible Edges button
 .
. -
On the Quick Access toolbar, click Save
 to save your work.
© 2021 UDS