Check wall thickness for 3D print
-
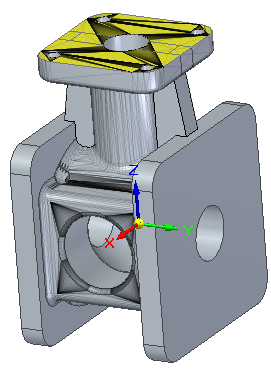
Open a .par, .asm, or .psm document to validate.
This part model contains a mix of mesh (facet) and solid faces.
-
Choose the 3D Print tab→Validate group→Wall Thickness command
 .
.The Wall Thickness command bar is displayed.
-
In the Minimum Thickness box, enter the wall thickness value that is required by the 3D printer you are using.
-
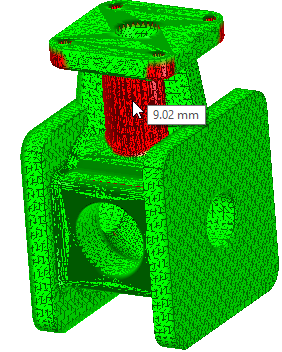
Click Calculate
 .
.When the analysis completes, it displays the color-coded results.
-
All faces that have less than the minimum thickness are shown in the default color (red).
-
All faces having more than the minimum thickness display in the default color (green).
-
-
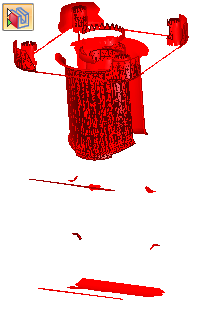
To show only the faces having less than the required minimum thickness, click Toggle Display
 .
.
-
Hover over each face identified in the analysis as having less than the minimal wall thickness to see its actual value.
Use the Wall Thickness command to check the minimal wall thickness of imported STL files that contain mesh bodies to verify they are suitable for 3D printing.
To choose different result colors, click the options button ![]() on the command bar to open the Wall Thickness Settings dialog box. For more information, see the Wall Thickness command bar help topic.
on the command bar to open the Wall Thickness Settings dialog box. For more information, see the Wall Thickness command bar help topic.
© 2021 UDS