Release documents using the Release command
-
In the Design Manager document list, click the Current Filename cell for the document of interest.
-
Choose Home tab→Action group→Release
 .
.If you specified the location where you want to save documents with Released status (QY CAD Options dialog box→Manage tab→Life Cycle page), Design Manager updates the relevant columns to prepare the document for the status change.
If you did not specify a location, Design Manager displays the Edit Path dialog box, where you can do either of the following:
-
To move all the files and not maintain the folder structure, on the Save Files to Single Folder tab, select the folder structure and then click OK.
Note:You can use the New Folder button to create a new folder at the location listed in the Folder box.
-
To move all the files and maintain the folder structure, on the Maintain Folder Structure tab, enter the new location and then click Replace All.
Note:To display a list of available locations, click the Browse button
 .
.
-
-
(Optional) To select a new location, in the New Location cell, click the Browse button
, and then choose a new location. 
-
Do one of the following:
-
To cancel the change, click the Current Filename cell for the document of interest, and choose Home tab→Action group→Clear Action
 .Note:
To cancel all changes, press Ctrl+A, and then click Clear Action.
-
To make the change, choose Home tab→Action group→Perform Actions
 .
.
-
-
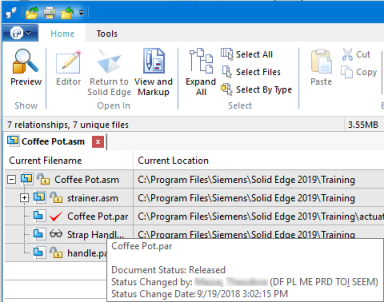
(Optional) For details about the status of any document, such as who released it and when, hover over the Current Filename cell for the document of interest.
© 2021 UDS