Move cage elements
-
Select the cage element(s) that you want to move. Press Shift as you select to add or remove elements from the select set. The steering wheel is displayed on the model at keypoints of the selected elements.
In this case, the elements selected remain in place, while new edges and faces are created as a result of the move operation.
-
On the command bar, choose the Tip or Lift Selected Faces option to control how the cage model responds to your changes.
-
Lift adds faces to the model, leaving existing faces in their current positions and orientations as you move the selected elements. Lift can only be used when the select set contains faces.
-
Tip trims, extends, or changes the current orientation of faces connected to the elements in the select set.
A subdivision feature requires exponentially more time to re-draw with each new face you add.
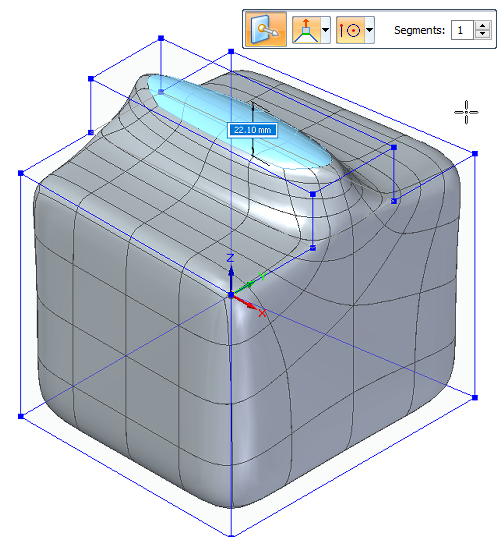
Example:Move with the Lift option selected.
You can enter the number of sections to create in the Segments box. This allows the result to be split as it is created.
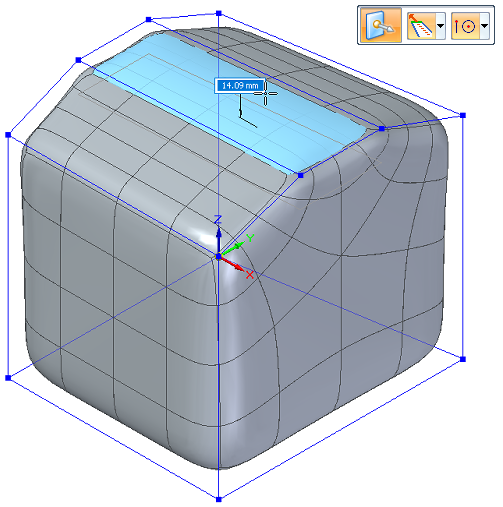
 Example:
Move with the Tip option selected.
-
-
Position the steering wheel on the model to provide an appropriate basis for the changes you want to make.
-
Use the steering wheel axes or torus to move or reorient the selected cage elements.
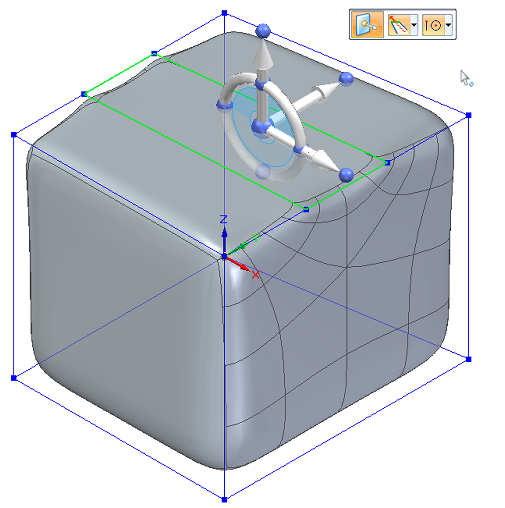
Move selected cage elements using the steering wheel and the Tip or Lift options on the Move command bar.
© 2021 UDS