Insert a bend
In the ordered environment, you can insert a bend with the Bend command.
In the synchronous environment, you can insert a bend with the Select tool or insert a bend with the Bend command. Both workflows are explained in this topic.
Insert a bend in the ordered environment
-
Choose Home tab→Sheet Metal group→Bends list→Bend.

-
Define the profile plane.
-
Draw a profile. The profile, which must be a single linear element, represents the approximate location of the bend.
-
Choose Home tab→Close group→Close.

-
Define the bend location with respect to the profile.
-
Define which side of the part will move.
-
Define the bend direction.
-
Finish the feature.
-
You can automatically flatten the bend by setting the Flatten Bend option on the Bend Options dialog box.
Insert a bend in the synchronous environment with the Select tool
-
Choose Home tab→Select group→Select
 .
. -
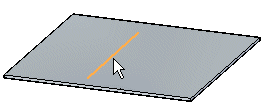
Select the sketch element to create the bend.
-
Choose Home tab→Sheet Metal group→Bends list→Bend
. -
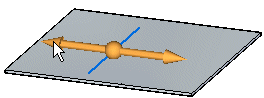
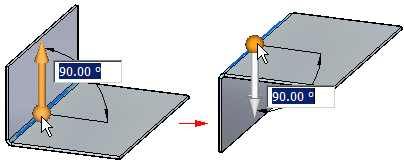
Click the side of the sketch to move.
-
(Optional) Click to the direction arrow to change the direction of the bend.
-
(Optional) Type a value to change the bend angle.

-
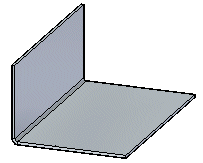
Click to create the bend.
Insert a bend in the synchronous environment with the Bend command
-
Choose Home tab→Sheet Metal group→Bends list→Bend
. -
Select the sketch element to create the bend.
-
Click the side of the sketch to move.
-
(Optional) Click to the direction arrow to change the direction of the bend.
-
(Optional) Type a value to change the bend angle.
-
Click to create the bend.
© 2021 UDS