Activity: Create a base revolved synchronous feature
Create a base revolved synchronous feature
Overview
This activity demonstrates the process of creating a part model using the Revolve command.
Objectives
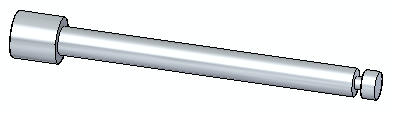
Create a vise screw to become familiar with the Revolve command for construction of base features.
In this activity you will:
-
Create a region consisting of sketch elements.
-
Use the Select tool to invoke the Revolve command.
Launch the Activity: Create a base revolved synchronous feature.
If you are using Internet Explorer and a video is not displaying in your training guide, click the Tools tab (or gear icon)→Compatibility View settings, and then clear the selection of Display intranet sites in Compatibility View.
Open a new ISO Metric part file
-
Create a new ISO Metric part file.
Sketch the initial basic shape
-
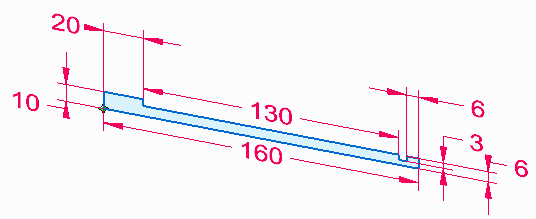
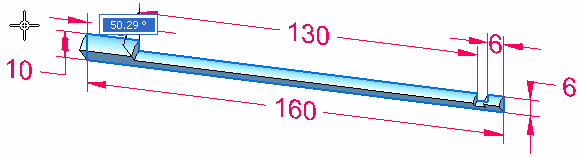
Draw and dimension the following sketch.
Create the base feature
-
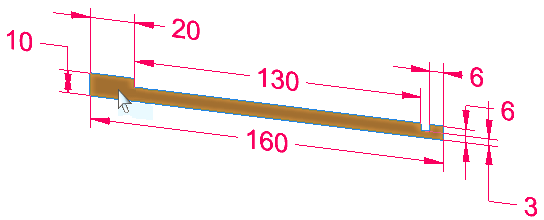
Select the region.
-
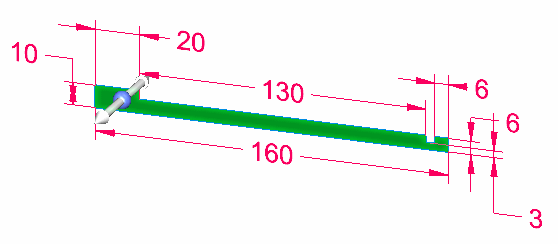
Click the extrude handle origin (1) and drag it to the edge (2).

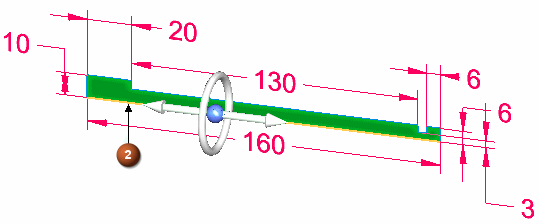
The extrude handle changes to a revolve handle. Edge (2) is the axis of revolution.
-
Click the torus to start the rotation extent definition.
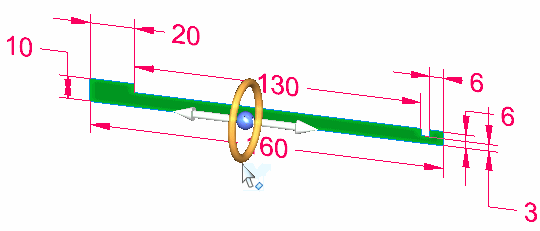
The geometry dynamically attaches to the cursor.
-
On command bar, select the Live Sections options (1) to turn it off.
Turn on the 360° extent option (2).

-
Save and close the file.
Summary
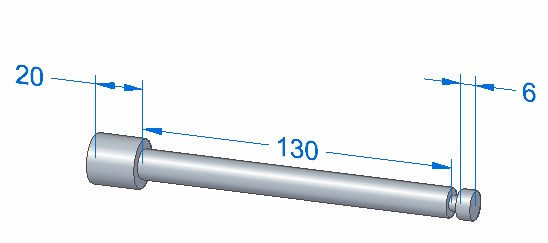
In this activity you learned how to create a revolved base feature. A sketch was created and dimensioned. A region was revolved and the sketch dimensions migrated to the base feature. The extrude handle changes to a revolve handle when you drag it to an edge.
-
Click the Close button in the upper–right corner of this activity window.
© 2021 UDS