General tab (Nailboard Drawing View)
- Description
-
Describes a drawing view. You can type any additional notes or documentation you need.
- Sheet
-
Displays the name for the drawing sheet in the draft document that contains the drawing view . You can edit this value to move the drawing view to another working sheet in your document.
Using this option is similar to cutting and pasting drawing views to a new working sheet. All dimensions and annotations connected to geometry inside the view also move to the selected sheet.
- View Scale
-
Sets the nailboard view scale using either of the following methods.
- Scale
-
Selects a predefined drawing scale ratio.
The specified ratio defines the size of the drawing in relation to the size of the real-world object. For a 2:1 ratio, the 2 represents the size of the drawing, and the 1 represents the size of the real-world object.
- Scale value
-
Defines the nailboard view scale based on a value you type. You can enter a decimal value, a ratio, or a whole number.
If you enter a ratio or whole number, it converts to the equivalent decimal value in the Scale value box. However, the ratio is displayed in the Scale list, and it can be referenced in the drawing view caption or elsewhere on the drawing.
Example:-
If you enter 5, then the Scale value is displayed as 5.000, and the sheet Scale list is set to 5:1.
-
If you enter 1/3, then the Scale value is displayed as 0.333 and the sheet Scale list is set to 1/3.
-
If you enter a custom ratio, such as 3:2 or 3/2, the Scale value is displayed as 1.500, and the new ratio of 3:2 is added to the Scale list for the document.
-
- Nailboard Options
-
Sets the view options for the nailboard view.
- Name
-
Specifies the name of the nailboard view.
- Width
-
Specifies the width of the nailboard.
- Height
-
Specifies the height of the nailboard.
- Line Style
-
Specifies the rectangular line style for the nailboard.
- Fill Style
-
Specifies the fill style for the nailboard.
- Main Run
-
Displays the main run defined for the nailboard.
 Lock drawing view position
-
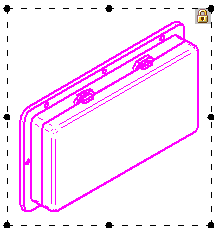
Prevents the selected drawing views from being moved accidentally when dragging the cursor. When this box is checked, and the drawing view is highlighted, a lock symbol is displayed within the drawing view boundary to indicate its position is fixed.

A locked drawing view still can be moved using explicit commands. To learn more, see Drawing view manipulation.
Note:A convenient way to lock and unlock a drawing view is to use the Lock Drawing View Position button on the Drawing View Selection command bar.
- Rotation angle
-
Specifies the rotation angle of the drawing view. The selected drawing view rotates about its center according to the angle you specify.
When a view is selected, one of these drawing view status messages is displayed at the bottom of the General tab:
-
This drawing view is Out-of-Date with respect to the model geometry.
-
This drawing view is Up-to-Date with respect to the model geometry.
You can update an out-of-date view using the Update command from the view shortcut menu. You can update all out-of-date views in the drawing using the Home tab→Drawing Views group→Update Views command on the ribbon.
© 2021 UDS