Draw a 3D sketch
-
Do one of the following:
-
In the synchronous environment, choose 3D Sketching tab→3D Draw group→3D Line command
 .
. -
In the ordered environment, choose the 3D Sketch command
 , and then select the Home tab→3D Draw group→3D Line command .
-
-
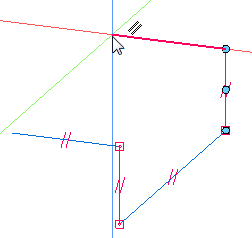
Define the first point of the line by clicking anywhere in the part window and notice that three alignment lines attach to the cursor.
-
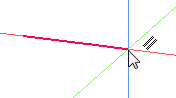
Move the cursor to the right. Position the cursor where it touches the red alignment line (X direction). When the parallel icon displays, click.
-
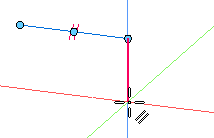
Move the cursor down. Position the cursor where it touches the blue alignment line (Z direction). When the parallel icon displays, click.
-
Move the cursor as shown. Position the cursor where it touches the green alignment line (Y direction). When the parallel icon displays, click.
-
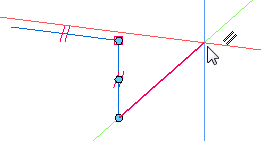
Move the cursor upwards. Position the cursor where it touches the blue alignment line. When the parallel icon displays, click.
-
Move the cursor to the left. Position the cursor where it touches the red alignment line. When the parallel icon displays, click.
-
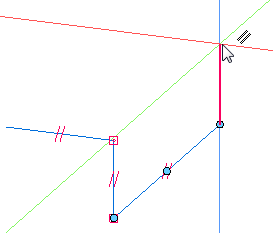
Press the Esc key to end the 3D Line command.
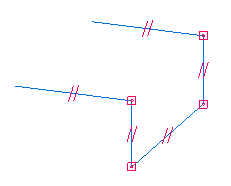
Your sketch is complete.
-
In the ordered environment, click
 to close the sketch.
You can create a synchronous or ordered 3D sketch using this basic procedure.
© 2021 UDS