Tutorial: Create and simulate a roof truss framework
-
Open the file FE_Roof.asm.
Simulation models are delivered in the \Program Files\UDS\QY CAD 2022\Training\Simulation folder.
-
If the Frame environment is not opened already, select Tools tab→Environs group→Frame
 .
. -
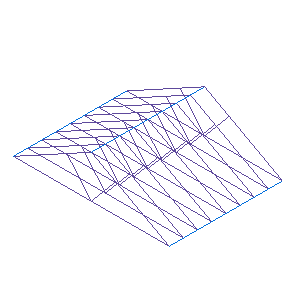
Create the initial truss.
-
On the ribbon, choose Home tab→Frame group→Frame
 .
. -
In the Frame Options dialog box, click OK.
-
In the Frame dialog box, open the ANSI folder, then the Rectangular Tubing folder. Select Rectangular Tubing 2x1 1I2x.12.par.
-
Click OK on any notification dialog box.
-
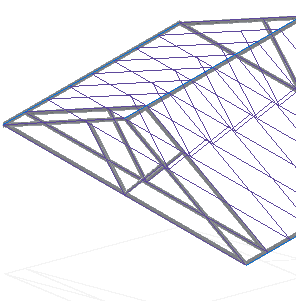
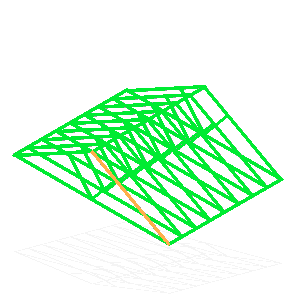
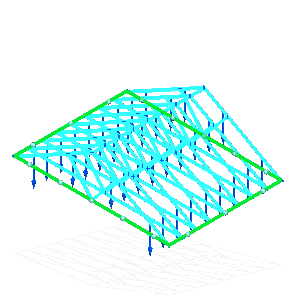
Select the first truss components as shown below.
-
Click the Accept button, and then click Finish.
-
In the Frame Options dialog box, choose OK.
-
-
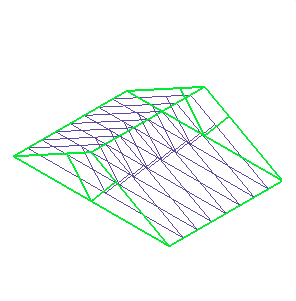
Create the remaining trusses.
-
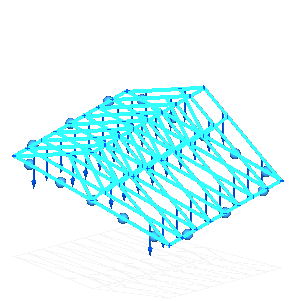
The Frame command is still active. Select the next truss components as shown.
-
Click the Accept button, and then click Finish.
-
In the Frame Options dialog box, choose OK.
-
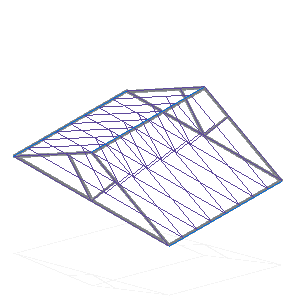
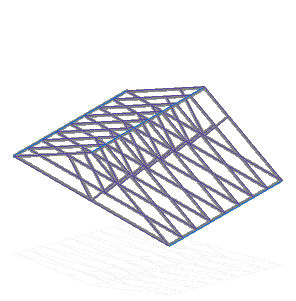
Repeat for the remaining trusses until the entire framework is created.
-
Press Esc to exit the Frame command.
Tip:As an alternate method of creating the framework you can drag a select box around all of the paths and all of the trusses will be created in one step.
-
-
Select the QY CAD Application button, and then choose Save.
-
Observe the Frame on PathFinder.
-
Note that a single Frame Components feature exists on PathFinder.
-
Expand this group and you can see all of the frames you created in the previous steps. Place your cursor over each frame and observe that it highlights in the view.
-
Expand each frame and the individual beams are displayed. Place your cursor over each beam and observe that it highlights in the view.
 Note:
Note:If you used the single selection of all paths at one time as explained in the previous tip, PathFinder displays just one frame containing all of the beams.
-
-
Create a study.
-
Select the Simulation tab→Study group→New Study command.

-
Choose the Linear Static study type and Beam mesh type, and then click Options.
-
Under Results Options, in the Nodal section, select Beam end reactions.
-
Click OK.
-
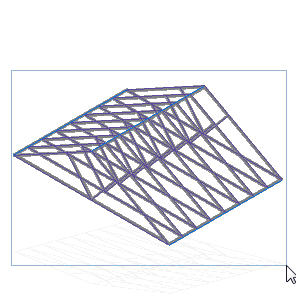
The Define command in the Geometry group is active. Drag a selection box around the entire frameworks.
-
-
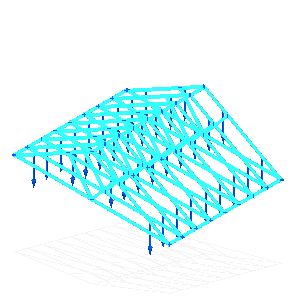
Place loads on the roof.
-
Select the Simulation tab→Structural Loads group→Force command.

-
On the command bar, change the Selection Filter to Curve. Select the beams on the top of the frame.
Note:There are 18 beam curves.
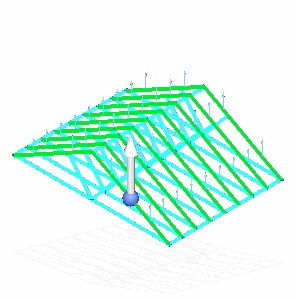
-
Select the Flip button
 on the Loads command bar to flip the load direction.
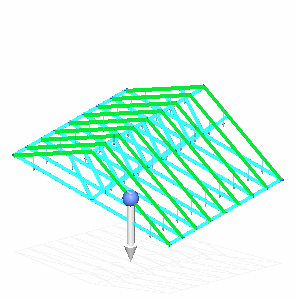
-
Type 1000 lbf in the Value box.
-
Right-click to accept, and then click to finish.
The force is placed.
-
-
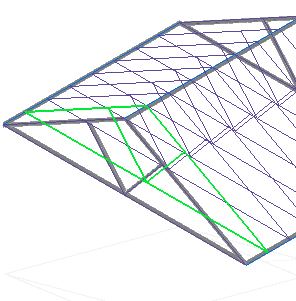
Add a fixed constraint to the outside members of the framework.
-
Select the Simulation tab→Constraints group→Fixed command.
-
On the command bar, change the Selection Filter to Curve.
-
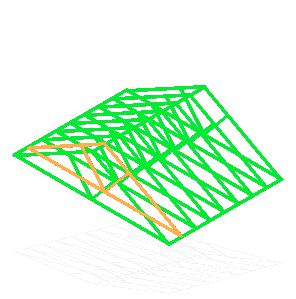
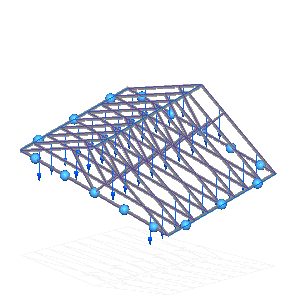
Select the four outside beams shown below.
-
Right-click to accept, and then click to finish.
-
-
In the Simulation pane, do the following:
-
Place your cursor over the Geometry node and right-click. Select Hide Beam Curve.
-
Turn off the display of the loads and constraints by clearing the check boxes in front of them.
-
-
Mesh and solve the study.
-
Select the Mesh command, and in the Mesh dialog box, use the slider to define a subjective mesh size of 3 or 4.
-
Click the Mesh and Solve button.
After a few moments, the results are displayed in the Simulation Results environment.
-
-
Display beam reaction plots.
-
In the Home tab→Data Selection group:
-
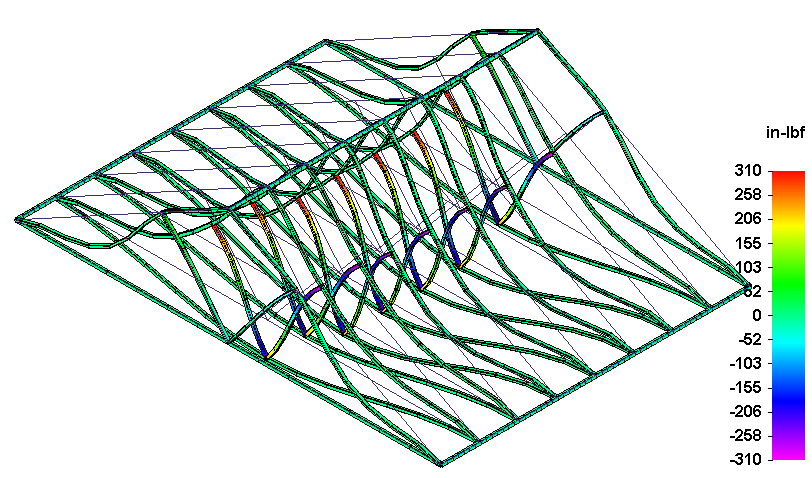
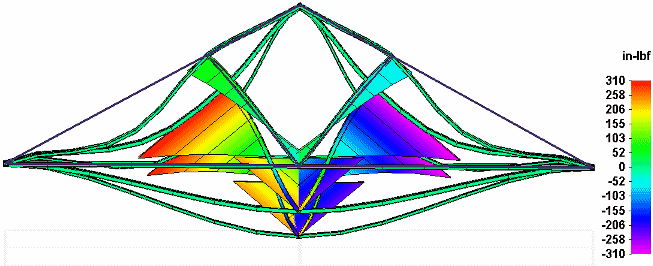
From the Result Type list, choose Beam End Reactions.
-
From the Result Component list, choose Beam Plane1 Moment.
Note:-
The color bar header is turned off in these images.
-
The units for moment values are inches-pounds force.
-
-
-
Without changing the Result Type =Beam End Reactions selection, review the other results that are available in the Result Component list.
-
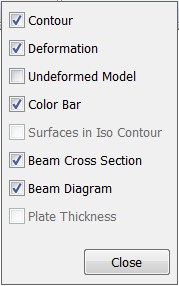
Choose Home tab→Show group→Display Options
 .
. -
Verify that the Contour, Deformation, Color Bar, and Beam Cross Section options are selected, and click Close.
-
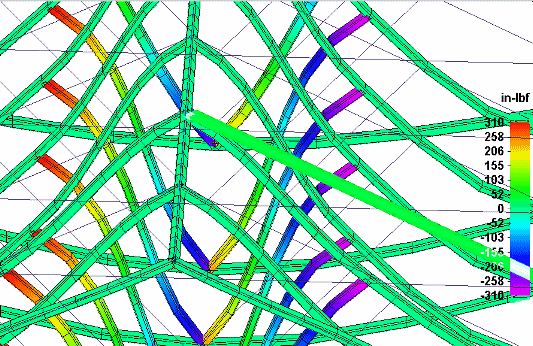
From the Display tab→Primary Display group→ Edge Style list, select External Mesh.
-
From the Color Bar tab→Format group→ Format list, select Floating Point.
Note:If your plot results do not look like the images shown above, do the following:
-
-
Display a beam diagram.
-
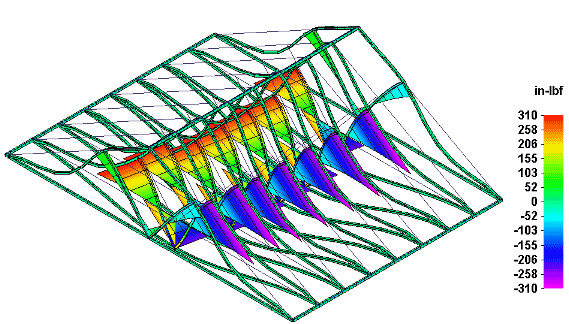
Select Home tab→Show group→Display Options, and select the Beam Diagram check box.
-
Verify that Beam End Reactions is still selected in the Result Type list. From the Component Type list, select Beam Plane1 Moment.
-
Compare the beam cross section results, shown above, with the beam diagram results for the beam end reactions, shown below.
 Note:
Note:To learn more about beam plots:
-
-
Close this file.
In this activity, you will explore how to construct and simulate a framework of roof trusses.
© 2021 UDS