Reorient command
The 3D Print tab→Prepare group→Reorient command  positions the part model in the printer space. Define the printer settings
  and then use the positioning options on the Reorient command bar to find the optimum position to print your model.
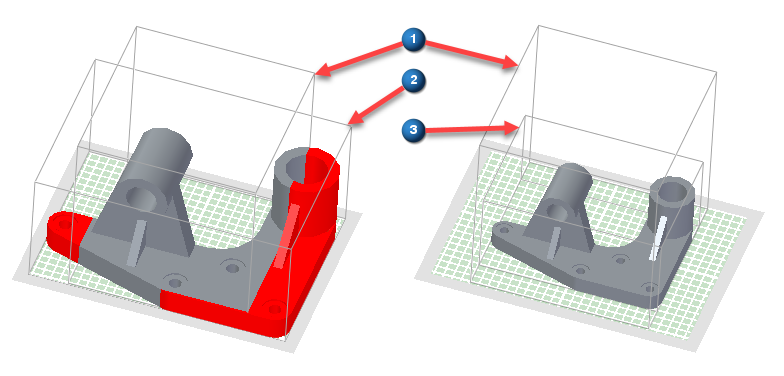
Whenever the model exceeds the printer space, the portions of the part model outside the printer space display in red.

If the model is larger than the printer space, use the Scale to Fit option  to resize the model to fit inside the printer space.
The Settle option  positions the model's closest planar face to the printer bed while maintaining its current orientation.
To manually reposition the model, use the Move or Rotate options.
-
To move the model, select Move on the command bar. Enter a distance in the X, Y, or Z fields and press Enter. You can only move in one direction at a time. Pressing Enter again performs another move of the same distance and direction. Selecting the Move action list resets the field values. The move always uses the X, Y, or Z field that has focus.
-
To rotate the model, select Rotate on the command bar. Enter a rotation angle in the X, Y, or Z fields and press Enter. You can only rotate around one axis at a time. Pressing Enter again performs another rotation around the same axis using the same angle. Selecting the Move action list resets the field values. The rotation always uses the X, Y, or Z field that has focus.
Select the Auto Orient option  to quickly reorient the model. Each click proceeds to another orientation. This option can speed up the reorientation process without having to manually reorient the model. Use the Undo and Redo options to go back and forth while repositioning the model. If you want to return to the original orientation, select the Reset Orientation
  option.
© 2021 UDS