Create an alternate position assembly drawing view
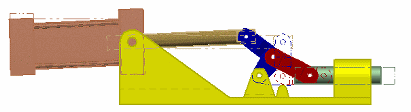
When an assembly contains mechanisms like linkages and actuators that change position during the physical operation of the assembly, these may be defined as alternate position members in an alternate position assembly model. When you use the View Wizard to create a drawing view of the assembly, you can choose the different positions you want to show in the drawing view.
-
In the Draft document, choose the Home tab→Drawing Views group→View Wizard command
 .Tip:
.Tip:To create an alternate position assembly drawing view from an assembly document, select the New→Drawing from Active Model command from the Application menu. In the Create Drawing dialog box, ensure that the Run Drawing View Creation Wizard check box is selected.
-
In the Select Model dialog box, select an assembly that has alternate positions defined in it.
-
In the Drawing View Creation Wizard (Alternate Position Assembly):
-
Select one Primary position check box, and then select one or more Alternate position check boxes.
You can click the names in the Member Name column to see a preview of the assembly in each position.
-
Click Next to continue.
-
-
A preview of the alternate position assembly drawing view is shown on the sheet. By default, this is a pictorial (isometric, dimetric, or trimetric) view orientation. Do one of the following:
-
Position the drawing view where you want it and then click to place it.
-
Click the View Orientation button on the command bar to preview and select a different view orientation, and then click to place the view.
-
-
Do one of the following:
-
If you placed a pictorial view, then the View Wizard command ends. To place additional views of the assembly, select the Home tab→Drawing Views group→Principal View command.
-
If you placed a non-pictorial view, then you can continue folding additional views of the assembly by moving the cursor and clicking to place each one. Press Esc to exit the command.
-
-
The model position that you designate as the primary position contains the parts that are auto-ballooned when you create a parts list and shaded when you apply shading and gray scale.
-
After the drawing view is placed, you can select the Set Primary and Alternate Positions command on the drawing view shortcut menu, and then use the Set Primary and Alternate Positions dialog box to add and remove members from the view, and to change primary and alternate position designations.
| Set Primary and Alternate Positions dialog box |
© 2021 UDS