Activity: Broken-out section creation
Broken-out section creation
This activity demonstrates the use of the Broken-Out section command.
After completing this activity, you will be able to create a broken section of a part on a draft sheet in QY CAD.
Click here to download the activity file.
Launch the Activity: Broken-out section creation.
Create a new draft document
Create a new ISO draft document.
-
Choose the Application menu→New→ISO Metric Draft.
Set the drawing standards
-
Click the Application button.
-
On the Application menu, click Settings→Options.
-
In the QY CAD Options dialog box, click Drawing Standards. On the Drawing Standards page, set the Projection Angle to Third and the Thread Display Mode to ISO/BSI, and then click OK.
Define the drawing views
-
Choose the View Wizard command.
-
In the Select Model dialog box, make sure the Look in: field is set to the folder where you saved the activity files, and set the Files of Type option to Part Document (*.par).
-
Select crankcase.par and click Open.
-
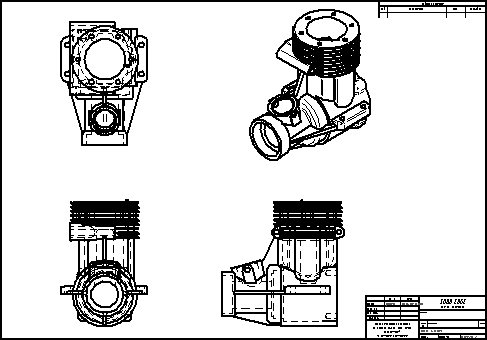
Set the view scale to 2:1, and then click to place a front view in the bottom-left corner of the sheet. Using the initial view as the starting point each time, move the cursor and click to place a top view, followed by a right view, and then an iso view, so that they are arranged on the drawing sheet as shown below. Right-click to end drawing view placement mode.
-
Move the views so they fit on the sheet.
Use the View Wizard command to place four drawing views on the new sheet.
Define the broken-out section view
-
Choose Home tab→Drawing Views group→Broken-Out
 .
. -
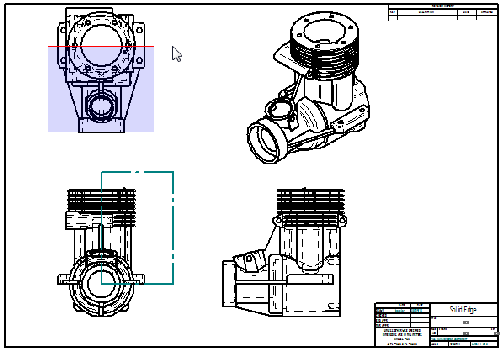
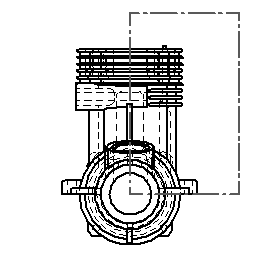
Select the front view. Beginning from the center of the circle, draw the profile shown.

-
Choose the Close Broken Out Section command
 .
. -
In the top view, define the extent of the section as shown.
-
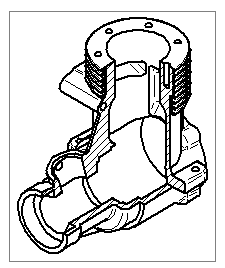
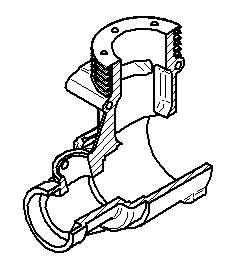
Select the iso drawing view to apply the broken-out section to.
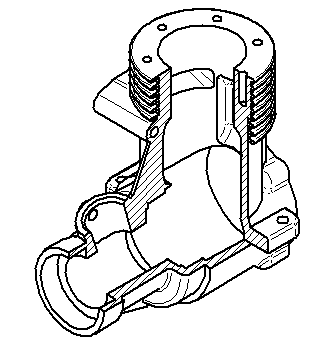
The section view will be displayed in the isometric view. Draw the profile defining the broken-out section in the front view.
Edit the broken-out section
-
Right-click the iso view and click Properties.
-
In the High Quality View Properties dialog box, click the General page and check Show Broken-Out Section view profiles and then click OK.
-
The profile for the broken-out section for the iso drawing view is shown in the front drawing view.
-
To edit the profile, click the rectangular profile in the front view.
-
Click Modify Depth on the command bar.
-
Type 80 mm for the Depth and press Enter. Click Accept.
-
The iso view is now out of date, signified by the box around the view.
-
Click the Update View command
 to refresh the iso drawing view.
The broken-out section appears as shown.
 Note:
Note:To remove a broken out section, delete the profile used to define the broken out region.
-
This completes the activity. Save the file as broken section.dft.
Activity summary
In this activity you learned how to create a broken-out section view. You also learned how to modify the broken-out section profile to create a different broken view representation.
-
Click the Close button in the upper-right corner of the activity window.
© 2021 UDS