Auxiliary View command
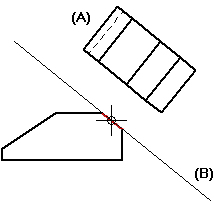
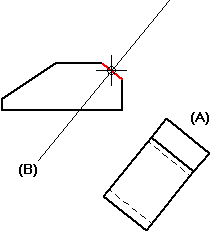
The Auxiliary View command  creates a new part view (A) that shows the part rotated 90 degrees about a viewing plane line (B) on an existing part view. The view plane line can be parallel or perpendicular to the geometry in the existing view.
You can use an auxiliary view to show geometry that cannot be dimensioned at any of the orientations shown in principal views or existing auxiliary views.


© 2021 UDS