Activity: Model an oil pan
Model an oil pan
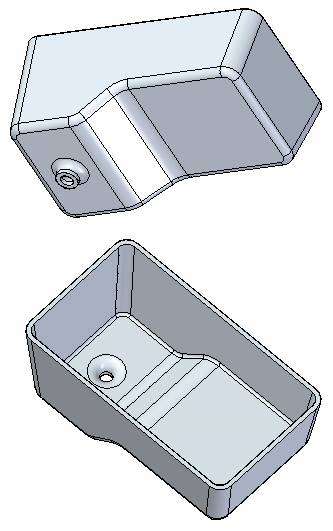
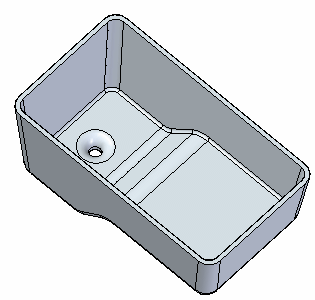
This activity demonstrates the process of constructing an automotive oil pan using treatment features.
Apply several types of features to a basic solid.
-
Drafted faces
-
Rounds
-
Thin wall
Click here to download the activity file.
Launch the Activity: Model an oil pan.
Open the part file
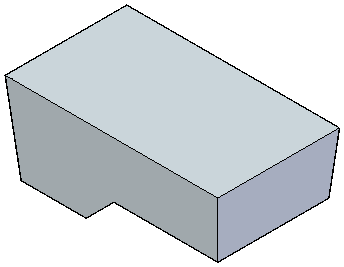
You will place draft, round and thin wall treatment features on a basic solid model.
-
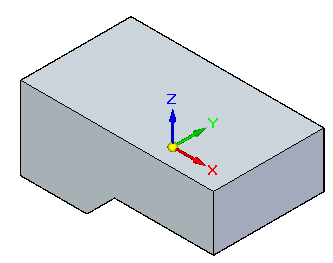
Open the part file oil_pan.par.
Drafting faces
-
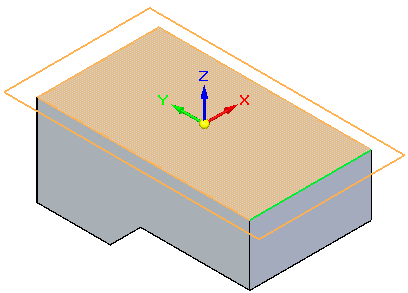
Choose the Draft command.
-
Select the top face as the reference plane. The faces draft with respect to this face.
-
To specify the faces to draft, select All Normal Faces from the Draft command bar list. Select on the side of the part.
-
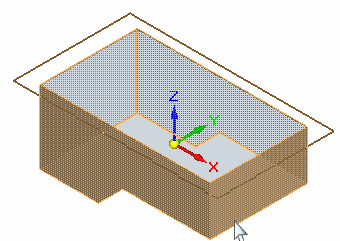
Type 5 degrees into the dynamic input box and select the draft arrow to define the direction as shown.
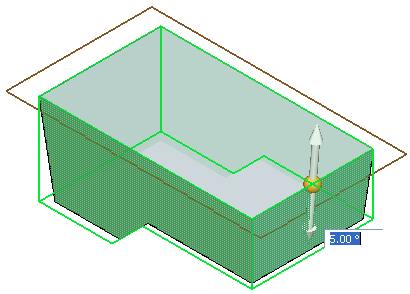
Right-click to accept this angle and direction.
Add a drain
-
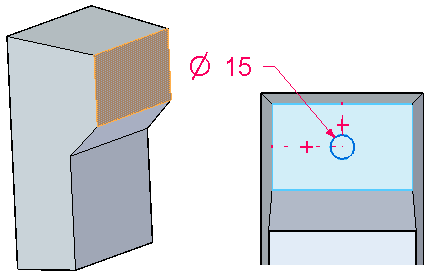
Create a drain for the pan by extruding a circle from the bottom face. Sketch a circle centered on that face and dimension as shown.
-
Select the region formed by the circle and extrude it 8 mm.
Round edges
-
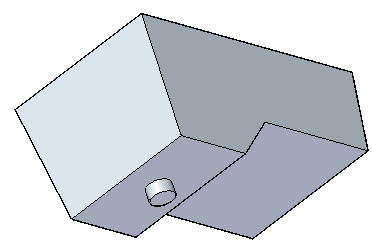
Using the Round command, select the two underside edges and give them a radius of 15 mm. Right-click to accept.

-
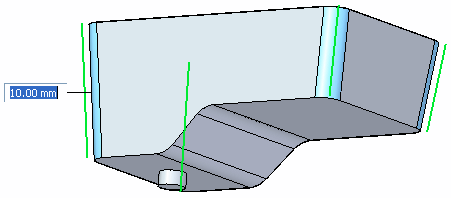
Round the vertical edges with a radius of 10 mm. Right-click to accept.
-
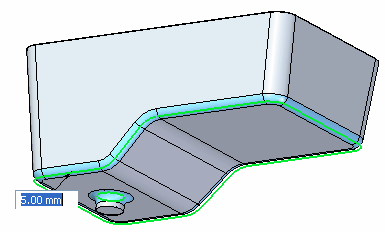
Select the chain along the bottom, as well as the edge of the drain. Define a radius of 5 mm and then right-click to accept.
-
Press Escape.
Thin wall
-
Choose the Thin Wall command.
-
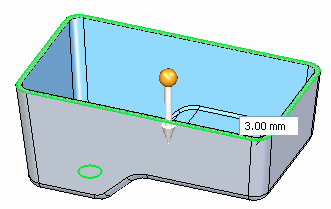
Enter a thickness of 3 mm into the dynamic input box. Remove the top face and the capping face for the drain. Define an interior thin wall.
Right-click to accept and finish.
-
Save and close this part.
Summary
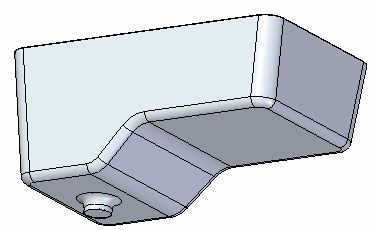
In this activity you applied the draft, round and thin wall treatment features to a solid model. These features are commonly used in the design of solid models.
-
Click the Close button in the upper-right corner of this activity window.
© 2021 UDS