Activity: Relating a single face with a rigid select set
Relating a single face with a rigid select set
Learn how to use the Coplanar command to apply a relationship to a single face while the select set remains rigid to the single face.
Click here to download the activity file.
Launch the Activity: Relating a single face with a rigid select set.
Open activity file
-
Open rigid_set.par.
Problem
Align the clevis base (2) at a 10° angle measured from the left upper edge (1). Clevis faces are to maintain their position (rigid) relative to the clevis base.
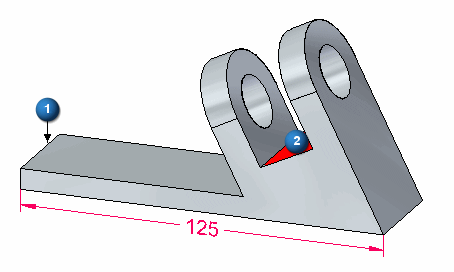
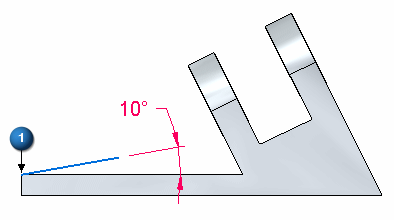
Create a 10° face
-
Select the face shown and click the Copy option (1) on the command bar.
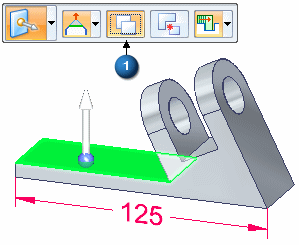
-
Drag the steering wheel to the edge shown. Rotate the copied face about this edge.
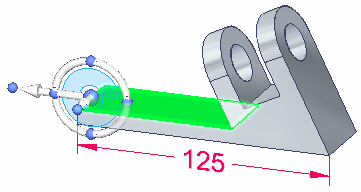
-
Click the torus on the steering wheel and then type 10 in the dynamic edit box. Press the Enter key.
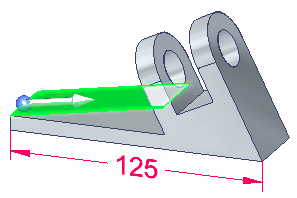
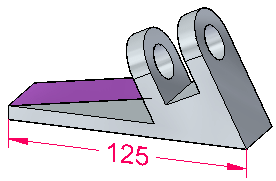
The face created in this step is a construction face.
Ground faces
-
On the Home tab→Face Relate group, choose the Ground command.

-
Select the two faces shown and click Accept.
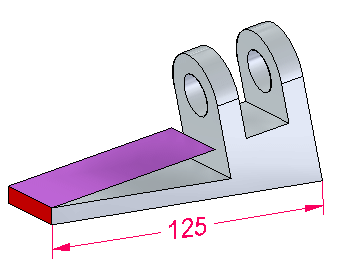 Note:
Note:After the synchronous edit, you can remove the two ground relationships in PathFinder.
To control the result, we will need to ground two faces.
Define the select set for the clevis
-
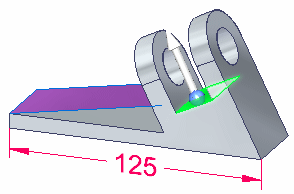
Select the seed face. This is the face that will have a relationship applied to it. Select the face shown.
-
To add faces to a select set, you press the Spacebar. Press the Spacebar and notice the selection mode symbol next to the cursor
 . Faces you select now add to the select set. Place a rectangular fence as shown. This selects all the faces that are part of the clevis.
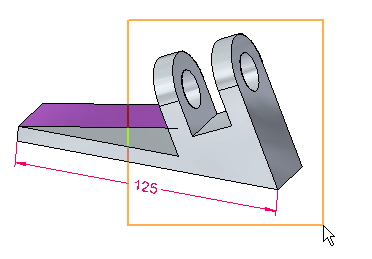
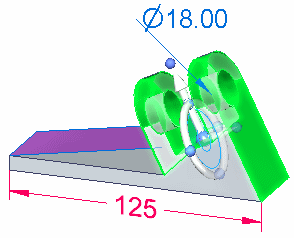
Choose the Relate command and options
-
On the Home tab→Face Relate group, choose the Coplanar relationship
 command.
Define the target face
-
Select the target face.
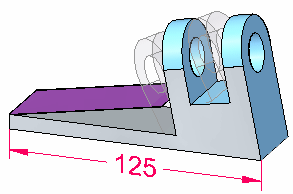
-
On the command bar, click the Accept button.

-
Double-click to end the Coplanar relationship command. Press the Escape key to clear the select set.
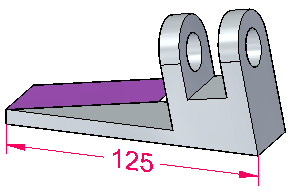
-
Notice that with the Persist option on, a coplanar relationship between the seed face and the target face (the copied rotated face) is in the Relationships collector.
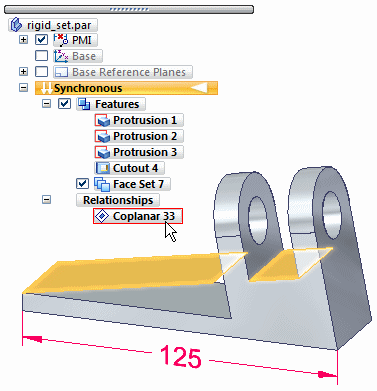
-
To verify the alignment, go to the front view by pressing Ctrl+F.
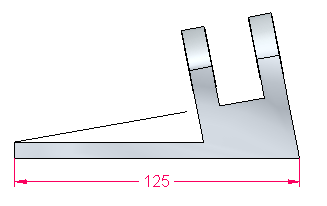
The target face is the face copied at the 10° angle. Selecting this target face makes the seed face coincident with it.
Turn off the copied face
-
In PathFinder, clear the check box for the copied face. This turns off the display.
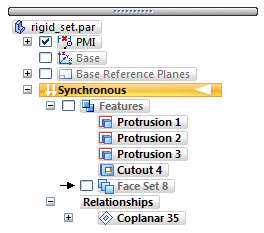
-
This completes the activity.
Summary
In this activity you learned how to use a relate command to apply a coplanar relationship between two faces. You also learned how to include other faces in the relate operation.
-
Close the file and do not save.
-
Click the Close button in the upper-right corner of the activity window.
| Activity: Relating faces using parallel, coplanar, perpendicular and concentric relationships |
© 2021 UDS