Activity: Add material to a base feature
Add material to a base feature
Overview
In this activity you will
-
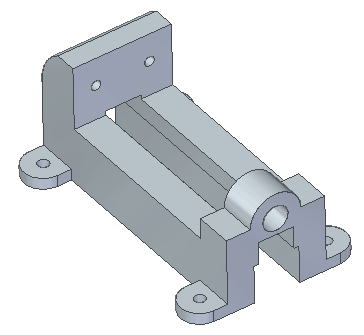
Create the four feet of the vise by extruding four regions at once.
-
Create cutouts at the back of the vice and through the feet.
Launch the Activity: Add material to a base feature.
If you are using Internet Explorer and a video is not displaying in your training guide, click the Tools tab (or gear icon)→Compatibility View settings, and then clear the selection of Display intranet sites in Compatibility View.
Open an existing file
-
Open the file saved from the Activity: Remove material from a base feature.
Add mounting flanges
-
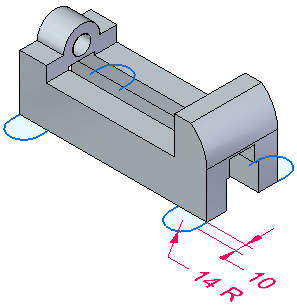
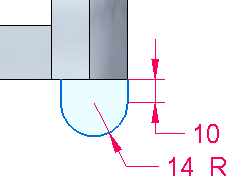
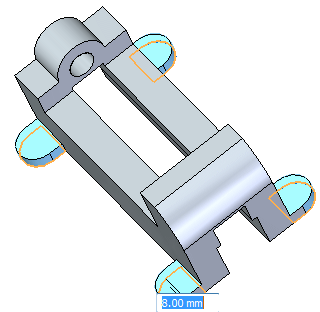
On the bottom face of the part, sketch four mounting flange profiles using line and arc elements.
-
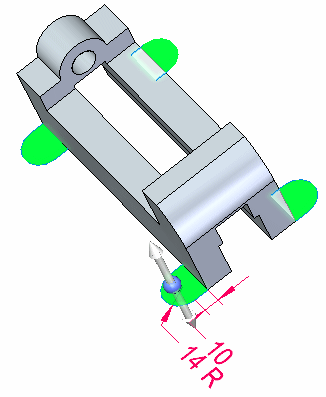
Holding the Shift key, select the four regions shown.
-
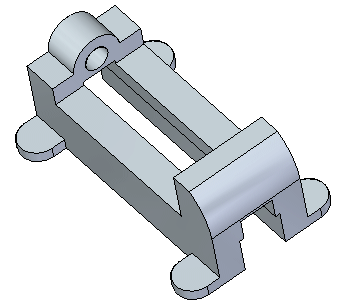
Select the “up” arrow to add material towards the top of the part. In the dynamic input box, type a distance of 8 mm and press Enter.
Create mounting holes
-
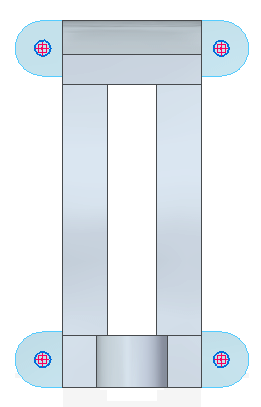
Sketch four circles of diameter 8 mm on each of the mounting flange faces. Place the circles concentric with flange arc.
-
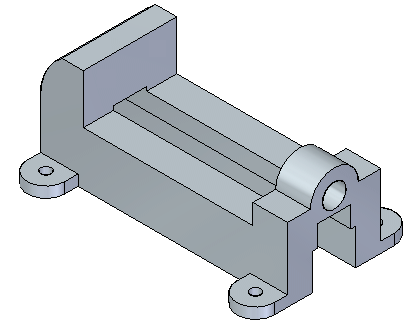
Select all four circles and remove material from the flanges.
Add circular cutouts
-
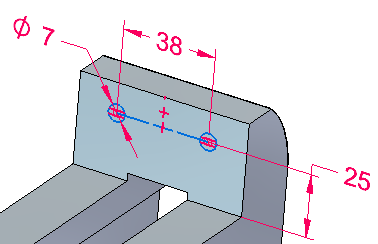
Sketch two 7 mm diameter circles on the face shown and add dimensions. To center the two circles on the face, draw a line connecting the two circle centers. Change the line to a construction element. Align the midpoint of construction line to the midpoint of the top edge on the face.
-
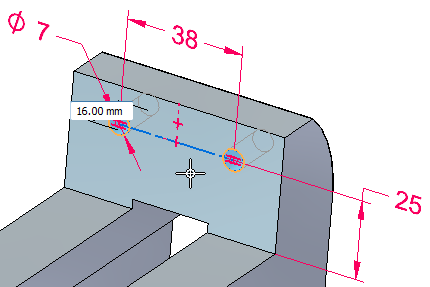
Select both circular regions. You may need to use QuickPick to select the regions.
-
Remove material at a depth of 16 mm.
-
Click the left mouse button to finish.

-
Save and close this file.
Summary
In this activity you continued to apply techniques to add and remove material from a base feature.
-
Click the Close button in the upper–right corner of this activity window.
© 2021 UDS