Activity: Detaching and attaching a feature
Detaching and attaching a feature
The activity guides you through the process of detaching an extruded feature and then attaching the copied feature at a new location on the model.

Click here to download the activity file.
Launch the Activity: Detaching and attaching a feature.
Open activity file
-
Open detach_a.par.
Select the feature to detach
-
In PathFinder, click the feature named Protrusion 2.

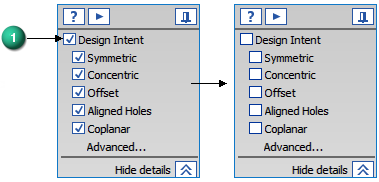
Suspend the Design Intent option
How to use the Design Intent panel is presented in the Working with geometric relationships self-paced course. At this time just suspend the Design Intent setting in the Design Intent panel while moving the cutout feature. This ensures no other faces in the model participate in the move.
-
On the Design Intent panel, uncheck the Design Intent (1) option.
Position the steering wheel origin
-
Drag the steering wheel origin to the midpoint of the edge shown.
Move the feature
-
On the command bar, choose the Detach option.
-
Click the steering wheel tool plane to start the move.
-
Select the midpoint of the edge shown to complete the move.
Attach the feature
-
Right-click in the part window and choose the Attach command.
Summary
In this activity you learned how to detach a feature, move it to a new location, and then attach the feature to the model. This process is similar to a cut and paste process.
-
Click the Close button in the upper-right corner of the activity window.
© 2021 UDS